How to transfer tokens between accounts in Solana smart contract ?
Understand how spl-tokens are transferred between accounts in solana using anchor framework


Let us walk through on how to transfer tokens in Solana using Anchor framework.
Outcome
By the end of this guide, you should be able to understand how to mint and transfer tokens between accounts in anchor framework. Please refer this github link to dive directly into the code.
What is an SPL-token?
Solana blockchain tokens are called as SPL-tokens. SPL-Tokens are created using token-program.
To create an SPL-Token, two steps must be followed,
- Create a mint (If the mint is not existing)
- Transfer a mint (to an associated token account(ATA))
Let us create SPL-Token in Anchor framework.
Prerequisites
This guide requires you to have following installed
- Rust CLI - Following this link for installing in your machine
- You should have installed
Solanain your machine - Please follow this link - Last but not the least - you should have installed Anchor Framework - Please follow this link
- Typescript on the client side. (Anchor Framework generates a client code as well)
Create an anchor Project
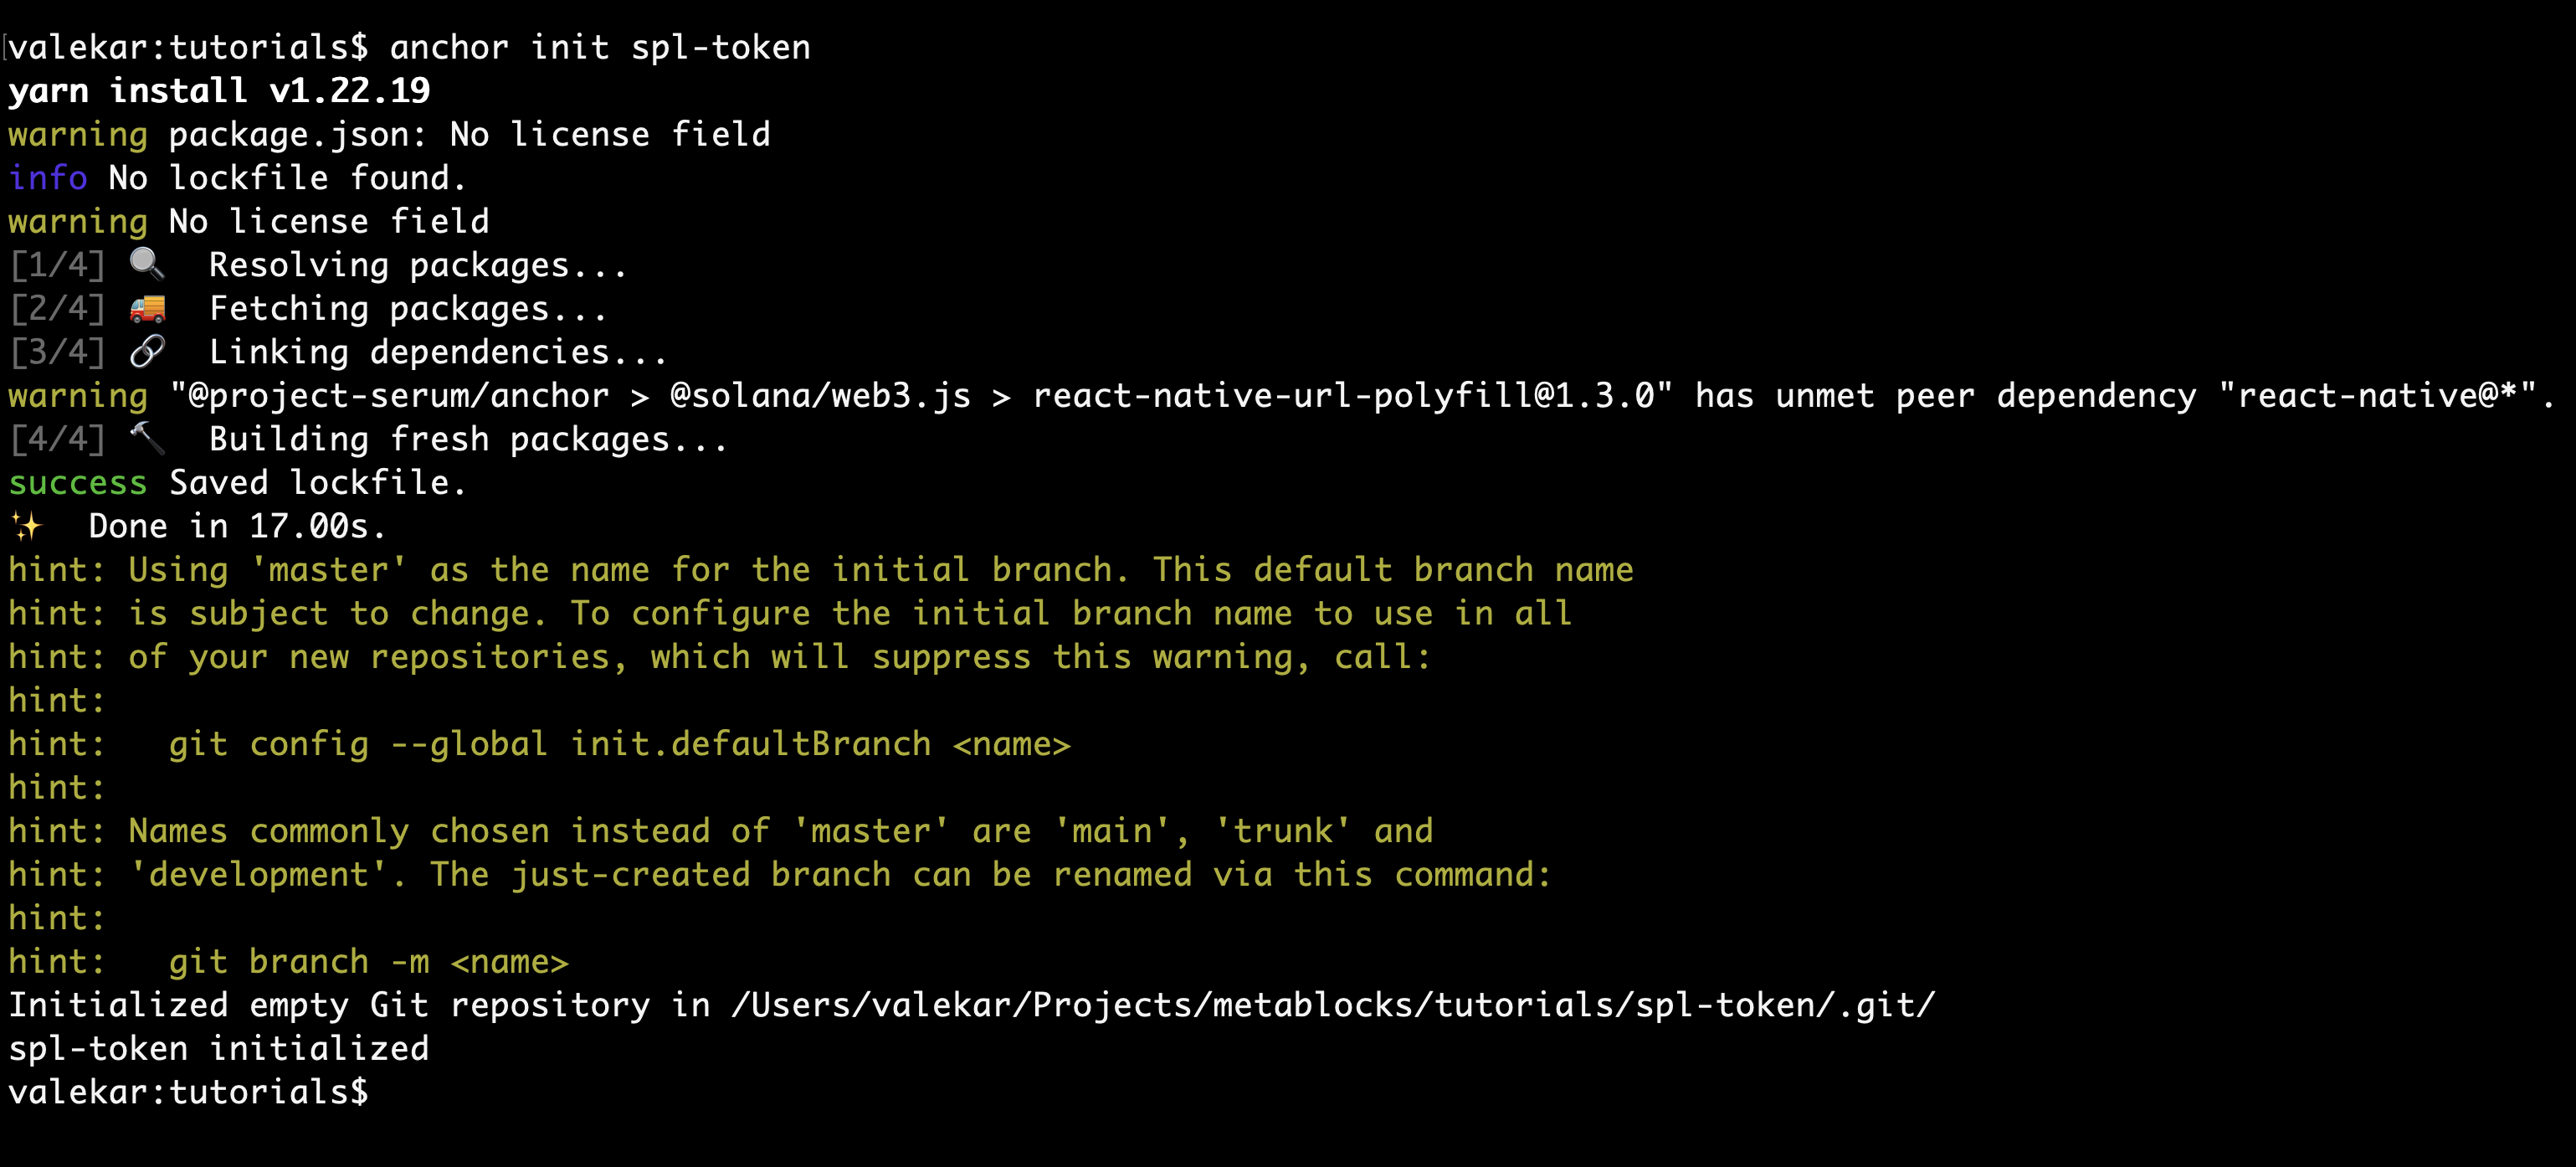
1. Run
anchor init spl-token
This will initialise a project like this below.
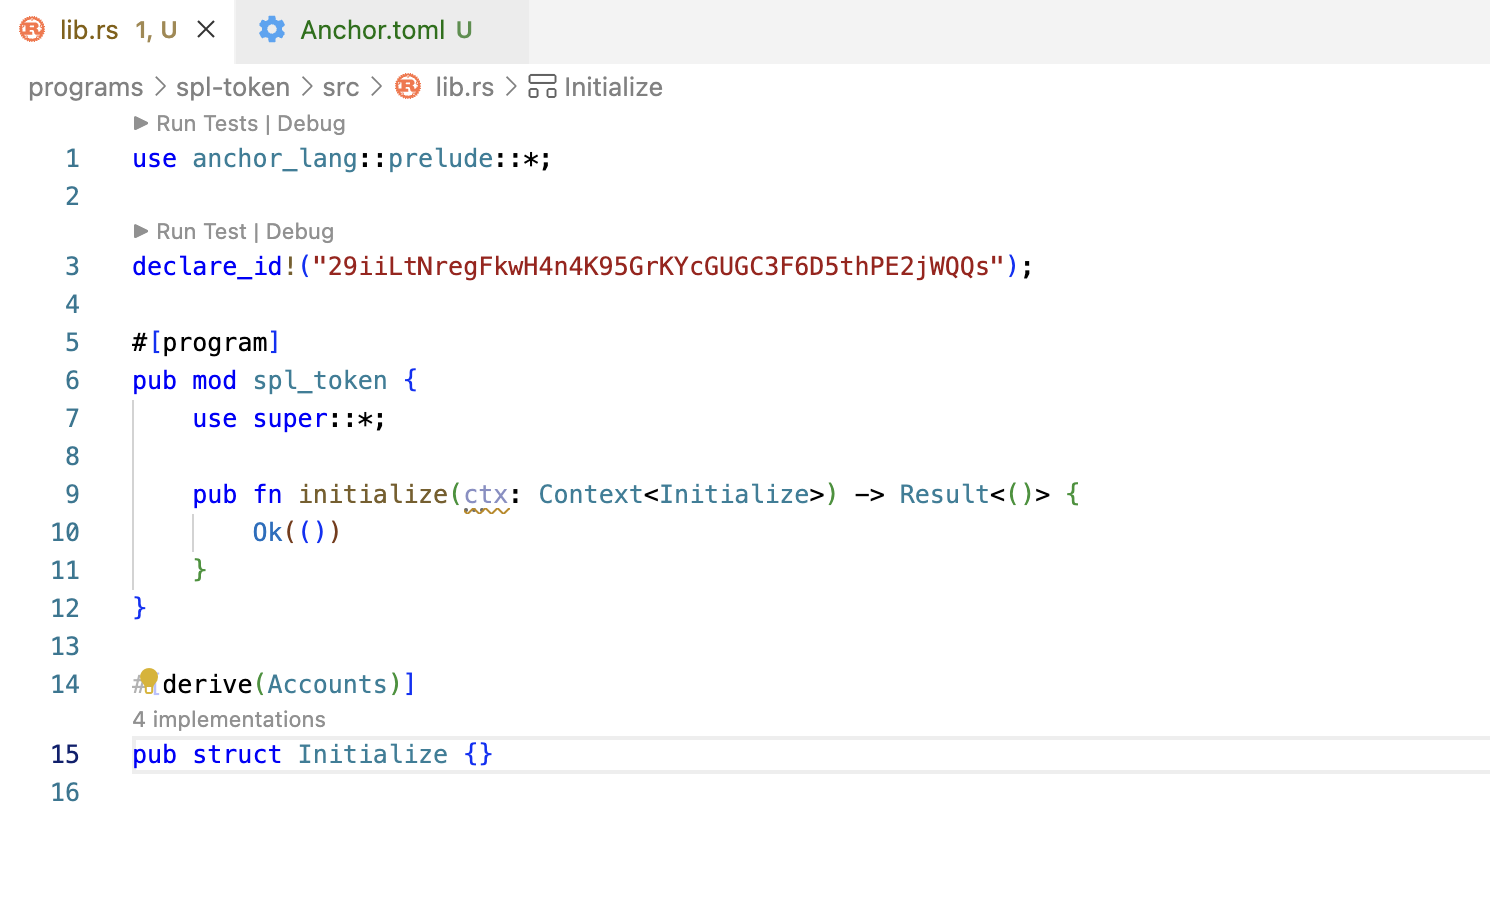
Open in your favourite editor and start doing the changes.
2. Run the below command
anchor test
This will install all dependencies of the project.
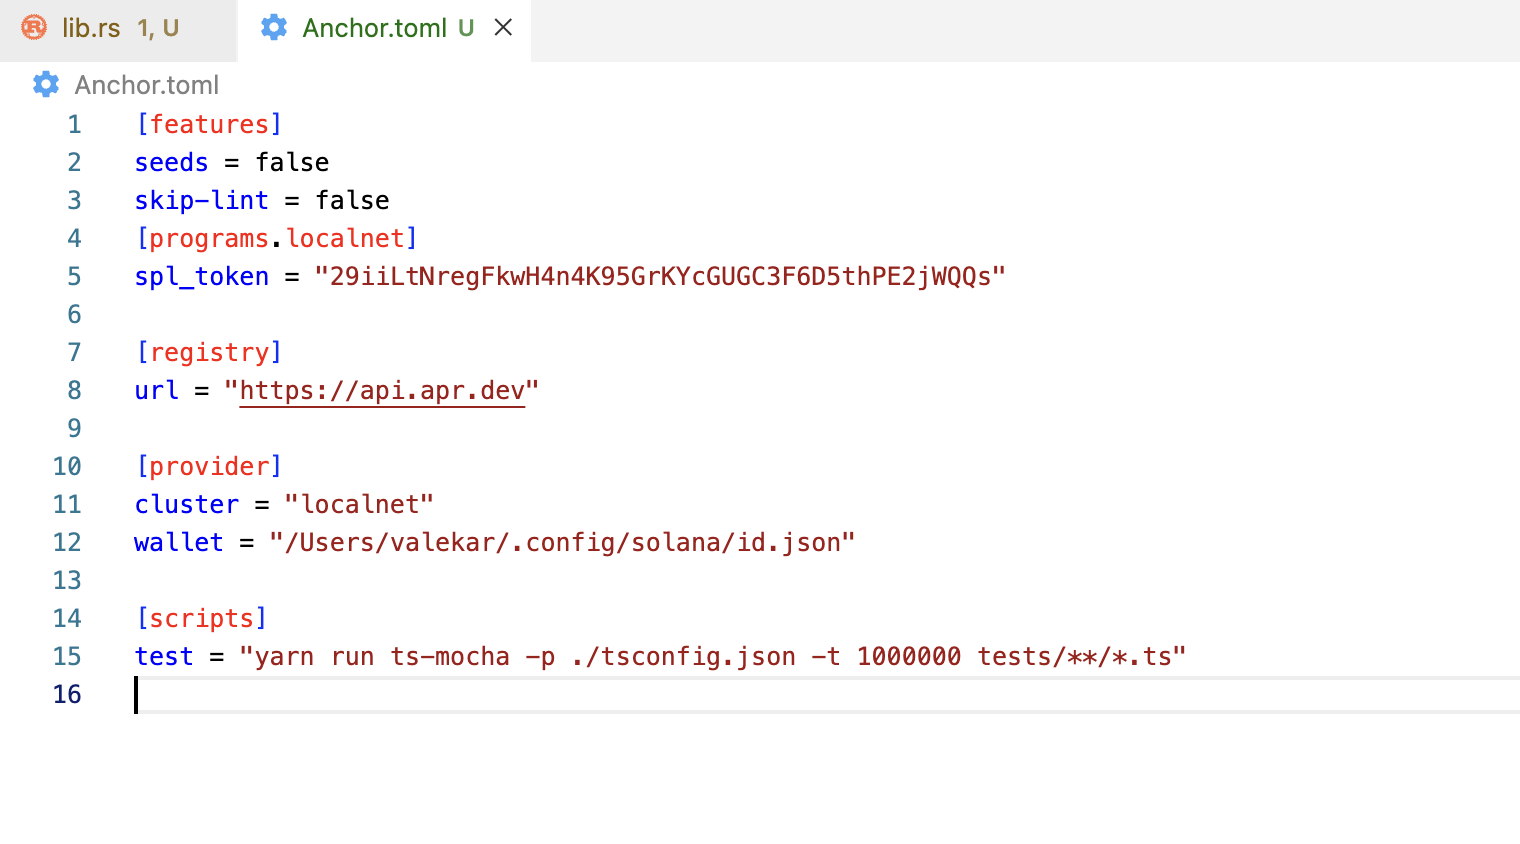
3. Change Program ID
Usually it is a good idea to change the ProgramID of the program. Get the public address of the spl-token program by running the following command
solana-keygen pubkey target/deploy/spl_token-keypair.json
This will give you the output as below

Replace 29iiLtNregFkwH4n4K95GrKYcGUGC3F6D5thPE2jWQQs in declare_id of lib.rs file
Also replace the address in Anchor.toml file of the project
Now let us create a Mint in the program.
How to create a mint?
You could think of mint as a metadata about a token that is being transferred to an account. A mint could be initialised in a context. In anchor framework the struct is passed as a context.
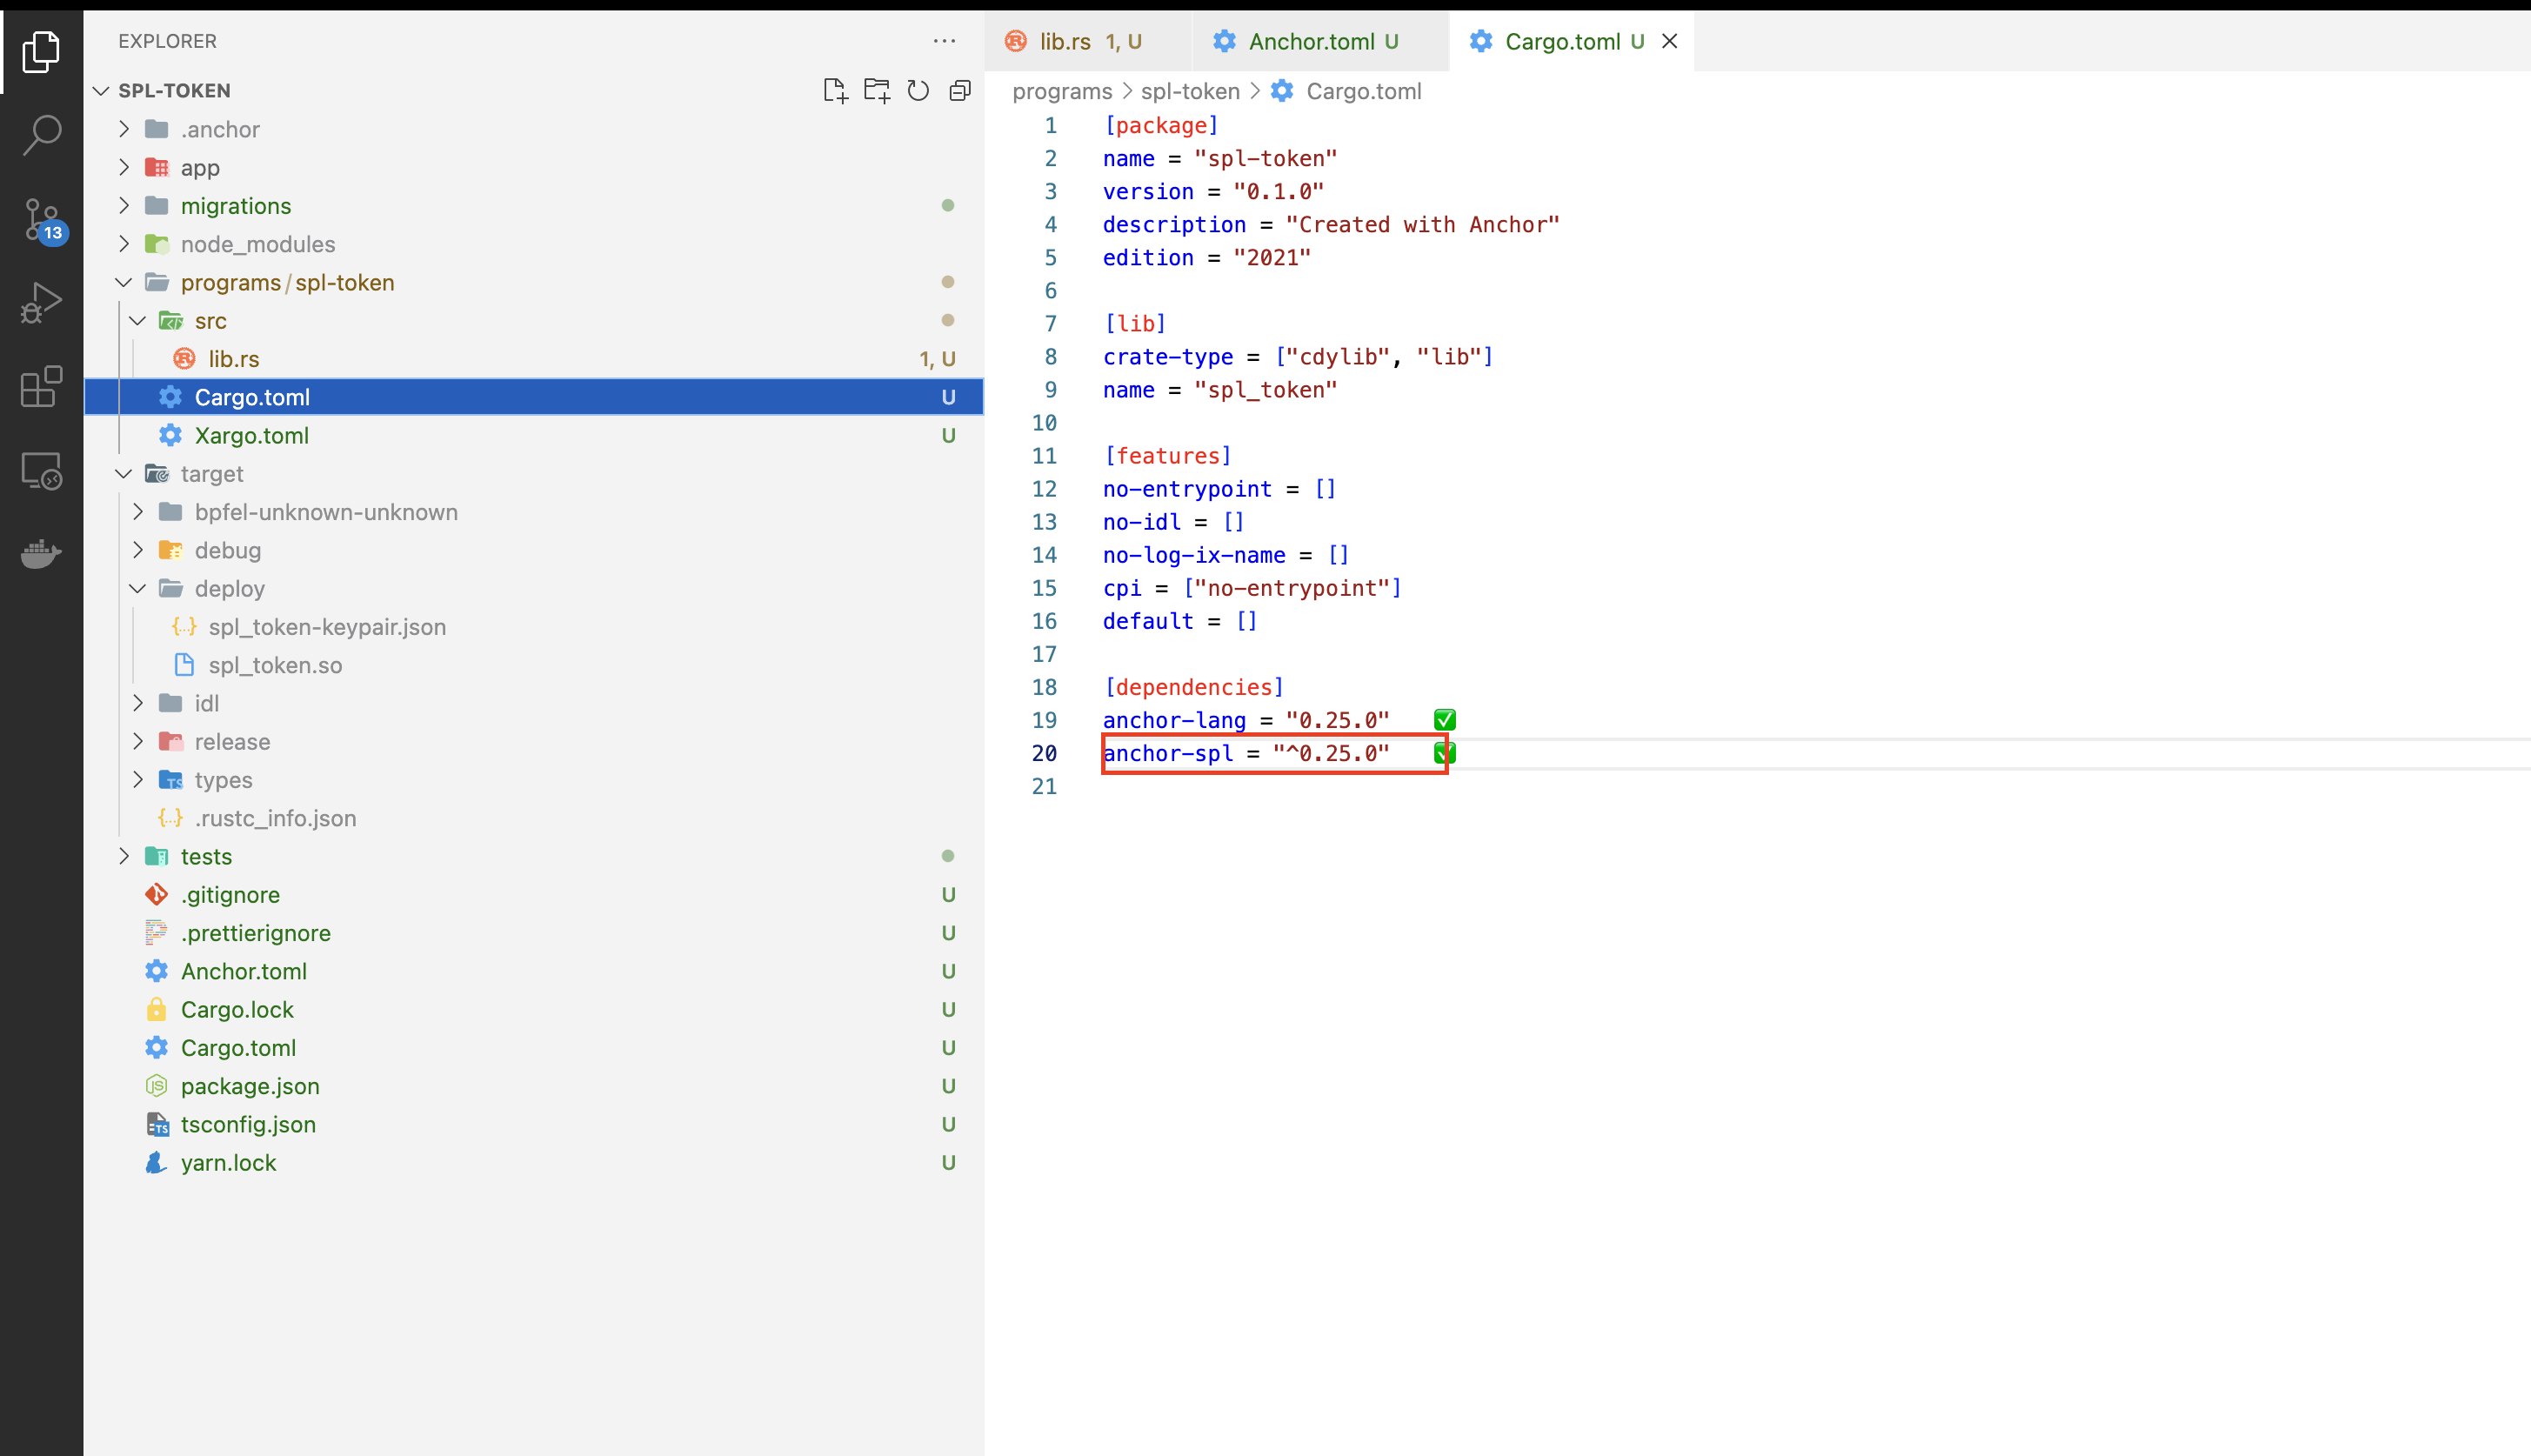
First let's import anchor_spl into the project so that we can create a mint. Add below in your cargo.toml file. And run anchor test or anchor build to check if everything is working fine.
anchor-spl = "^0.25.0"
Generally in Solana, any accounts that involve in the modification of state, are passed from the client side. This is done for parallel execution of programs. Refer this article from Anatoly Yakovenko
It becomes easier in to access these accounts using anchor framework. Pass these accounts as context parameter to an instruction.
How to create a CreateMint context ?
A struct can be defined as a context in an anchor program. Let us look at how this could be achieved.
First import the dependencies
use anchor_lang::prelude::*;
use anchor_spl::token::{Mint, Token};
Then, define a context(struct) for accessing these instructions. The CreateMint struct is decorated with #[derive(Accounts)]. This helps in deserialisation of accounts described in this struct
#[derive(Accounts)]
pub struct CreateMint<'info> {
    #[account(
        init,
         seeds = [
            b"spl-token-mint".as_ref(),
         ],
        bump,
        payer = payer,
        mint::authority = payer,
        mint::decimals = 0,
        mint::freeze_authority = payer
    )]
    pub spl_token_mint: Account<'info, Mint>, // ---> 1

    #[account(mut)]
    pub payer: Signer<'info>, // ---> 2

    pub system_program: Program<'info, System>, // ---> 3
    pub token_program: Program<'info, Token>,   // ---> 4
    // this is required for spl token mint
    pub rent: Sysvar<'info, Rent>, // ---> 5

    #[account(
        init,
        space = 8 + Vault::LEN,
        seeds = [
            b"vault"
        ],
        bump,
        payer = payer
    )]
    pub vault : Account<'info, Vault>, // ---> 6
}
In the above code, 6 accounts are passed.
- An
spl_token_mintaccount is created. In Solana, it is recommended to derive the account addresses using Program Derived Addresses (PDA). They are a deterministically generated address based on the program ID. Please refer this to know more about PDAs.
We setting other metadata fields like mint::authority and mint::freeze_authority to payer. We are setting mint::decimals to 0 for easy demonstration purpose. You could set the value to any number as you like-to.
payeris the one who is paying for callingcreate_mintinstruction. The account is asigneraccount and is set tomut.- We must pass
system_programas well while invoking any instruction in solana program. This helps creating accounts. Refer this to know more. token_programaccount is for interacting withtoken-program.rentaccount is used bytoken-programduring mint account creation.vaultaccount is a PDA generated account. It is used for storing the state of the program.Vaultstruct is passed into the account generic where actual state is stored. We will have to pass in the space as well. To calculate the space for storing please refer this.
We are passing Vault with vault account. To store the state of a program, a struct could be defined as follows
// Store the state
#[account]
pub struct Vault {
    bump : u8, //1
    spl_token_mint_bump:u8, // 1
    authority : Pubkey, //32
    spl_token_mint : Pubkey //32
}

impl Vault {
    pub const LEN: usize =1 + 1 + 32 + 32;
}
The Vault struct stores bumps and authority of who initialised this program. Later, you can use this to secure your program by restricting the access to the instructions. Stored bumps are used later for deriving PDA addresses in other instructions.
How to create an instruction?
Above created context is passed as an argument to an instruction. An instruction is a function where we could achieve a set of described procedure. This is usually a state change in the Solana blockchain. Any executed instruction is Turing complete.
Let us create an instruction which accepts the context as a parameter.
 pub fn create_mint(ctx: Context<CreateMint>) -> Result<()> {
      let vault = &mut ctx.accounts.vault;
      vault.authority = ctx.accounts.payer.key();
      vault.spl_token_mint_bump = *ctx.bumps.get("spl_token_mint").unwrap();
      vault.bump = *ctx.bumps.get("vault").unwrap();
      vault.spl_token_mint = ctx.accounts.spl_token_mint.key();

      Ok(())
 }
In the instruction above, we are storing the bumps and other state values into the Vault state.
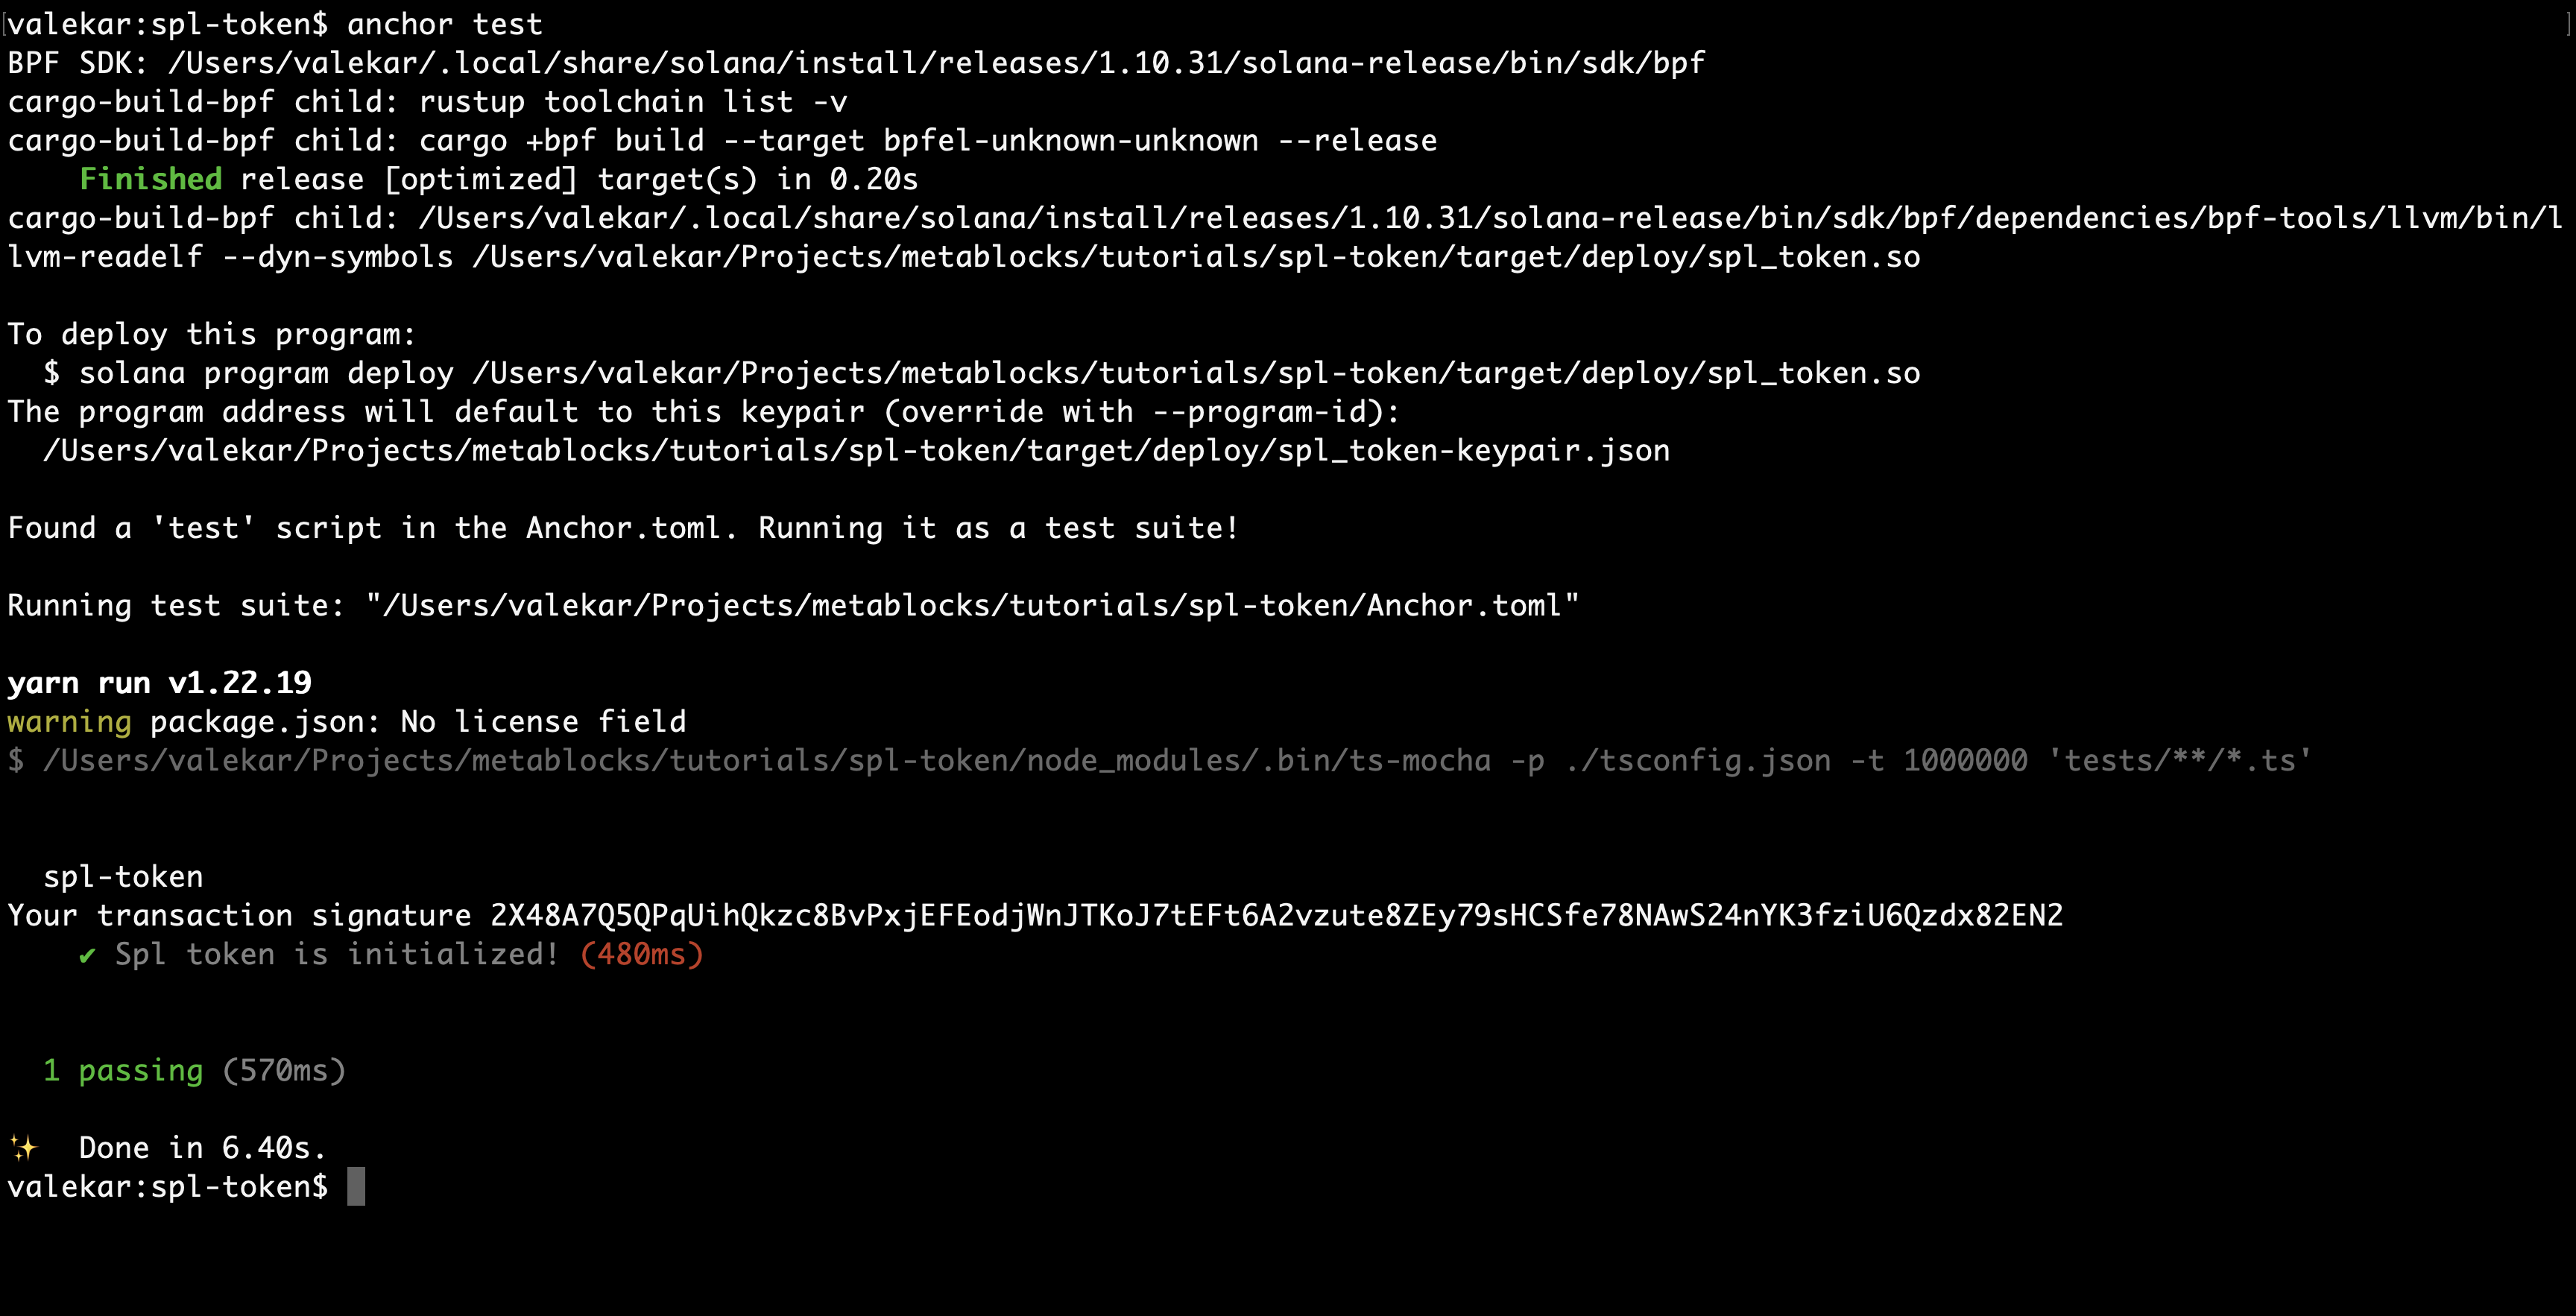
Now let us run the below command
anchor test
The anchor test command does the following operations
- It runs
cargo build-bpfcommand to generatebytecodeof the program - It generates Interface Definition Language(IDL) as.
- It runs
ts-mochacommand to run the test written inspl-token.tsfile. So let us discuss about it in the next section.
How to call the create_mint instruction from the client side?
We will write tests for calling the the create_mint instruction.
This is same as calling an instruction from the client side.
Preparations
- In the
contextstruct we are creating two PDA accounts(spl_token_mintandvault). Hence on the client side, we need to find PDAs for these two accounts, to pass these as arguments while calling thecreate_mintinstruction.
Import the necessary libraries in the spl-token.ts test file.
import * as anchor from "@project-serum/anchor";
import { Program } from "@project-serum/anchor";
import { SplToken } from "../target/types/spl_token";
import { PublicKey } from "@solana/web3.js";
import idl from "../target/idl/spl_token.json"; // this generated when we run anchor test command
- Then we will find two PDA addresses like below
// pda for spl-token-mint account
export const findSplTokenMintAddress = async () => {
  return await PublicKey.findProgramAddress(
    [Buffer.from("spl-token-mint")],
    new PublicKey(idl.metadata.address)
  );
};

// pda for vault account
export const findVaultAddress = async () => {
  return await PublicKey.findProgramAddress(
    [Buffer.from("vault")],
    new PublicKey(idl.metadata.address)
  );
};
- Add some
solsbefore calling the instruction. Hence, let's call the below method before calling any instructions in thespl-token.tstest file.
export const addSols = async (
  provider: Provider,
  wallet: anchor.web3.PublicKey,
  amount = 1 * anchor.web3.LAMPORTS_PER_SOL
) => {
  await provider.connection.confirmTransaction(
    await provider.connection.requestAirdrop(wallet, amount),
    "confirmed"
  );
};
Writing the test case
First, let us add a before block and add some sols to the payer wallet.
describe("spl-token", () => {
  const provider = anchor.AnchorProvider.env();
  // Configure the client to use the local cluster.
  anchor.setProvider(provider);
  const program = anchor.workspace.SplToken as Program<SplToken>;
  const payer = anchor.web3.Keypair.generate();

  before("Add sols to wallet ", async () => {
    await addSols(provider, payer.publicKey); // add some sols before calling test cases
  });
});
And we will call the create_mint from the test file like below.
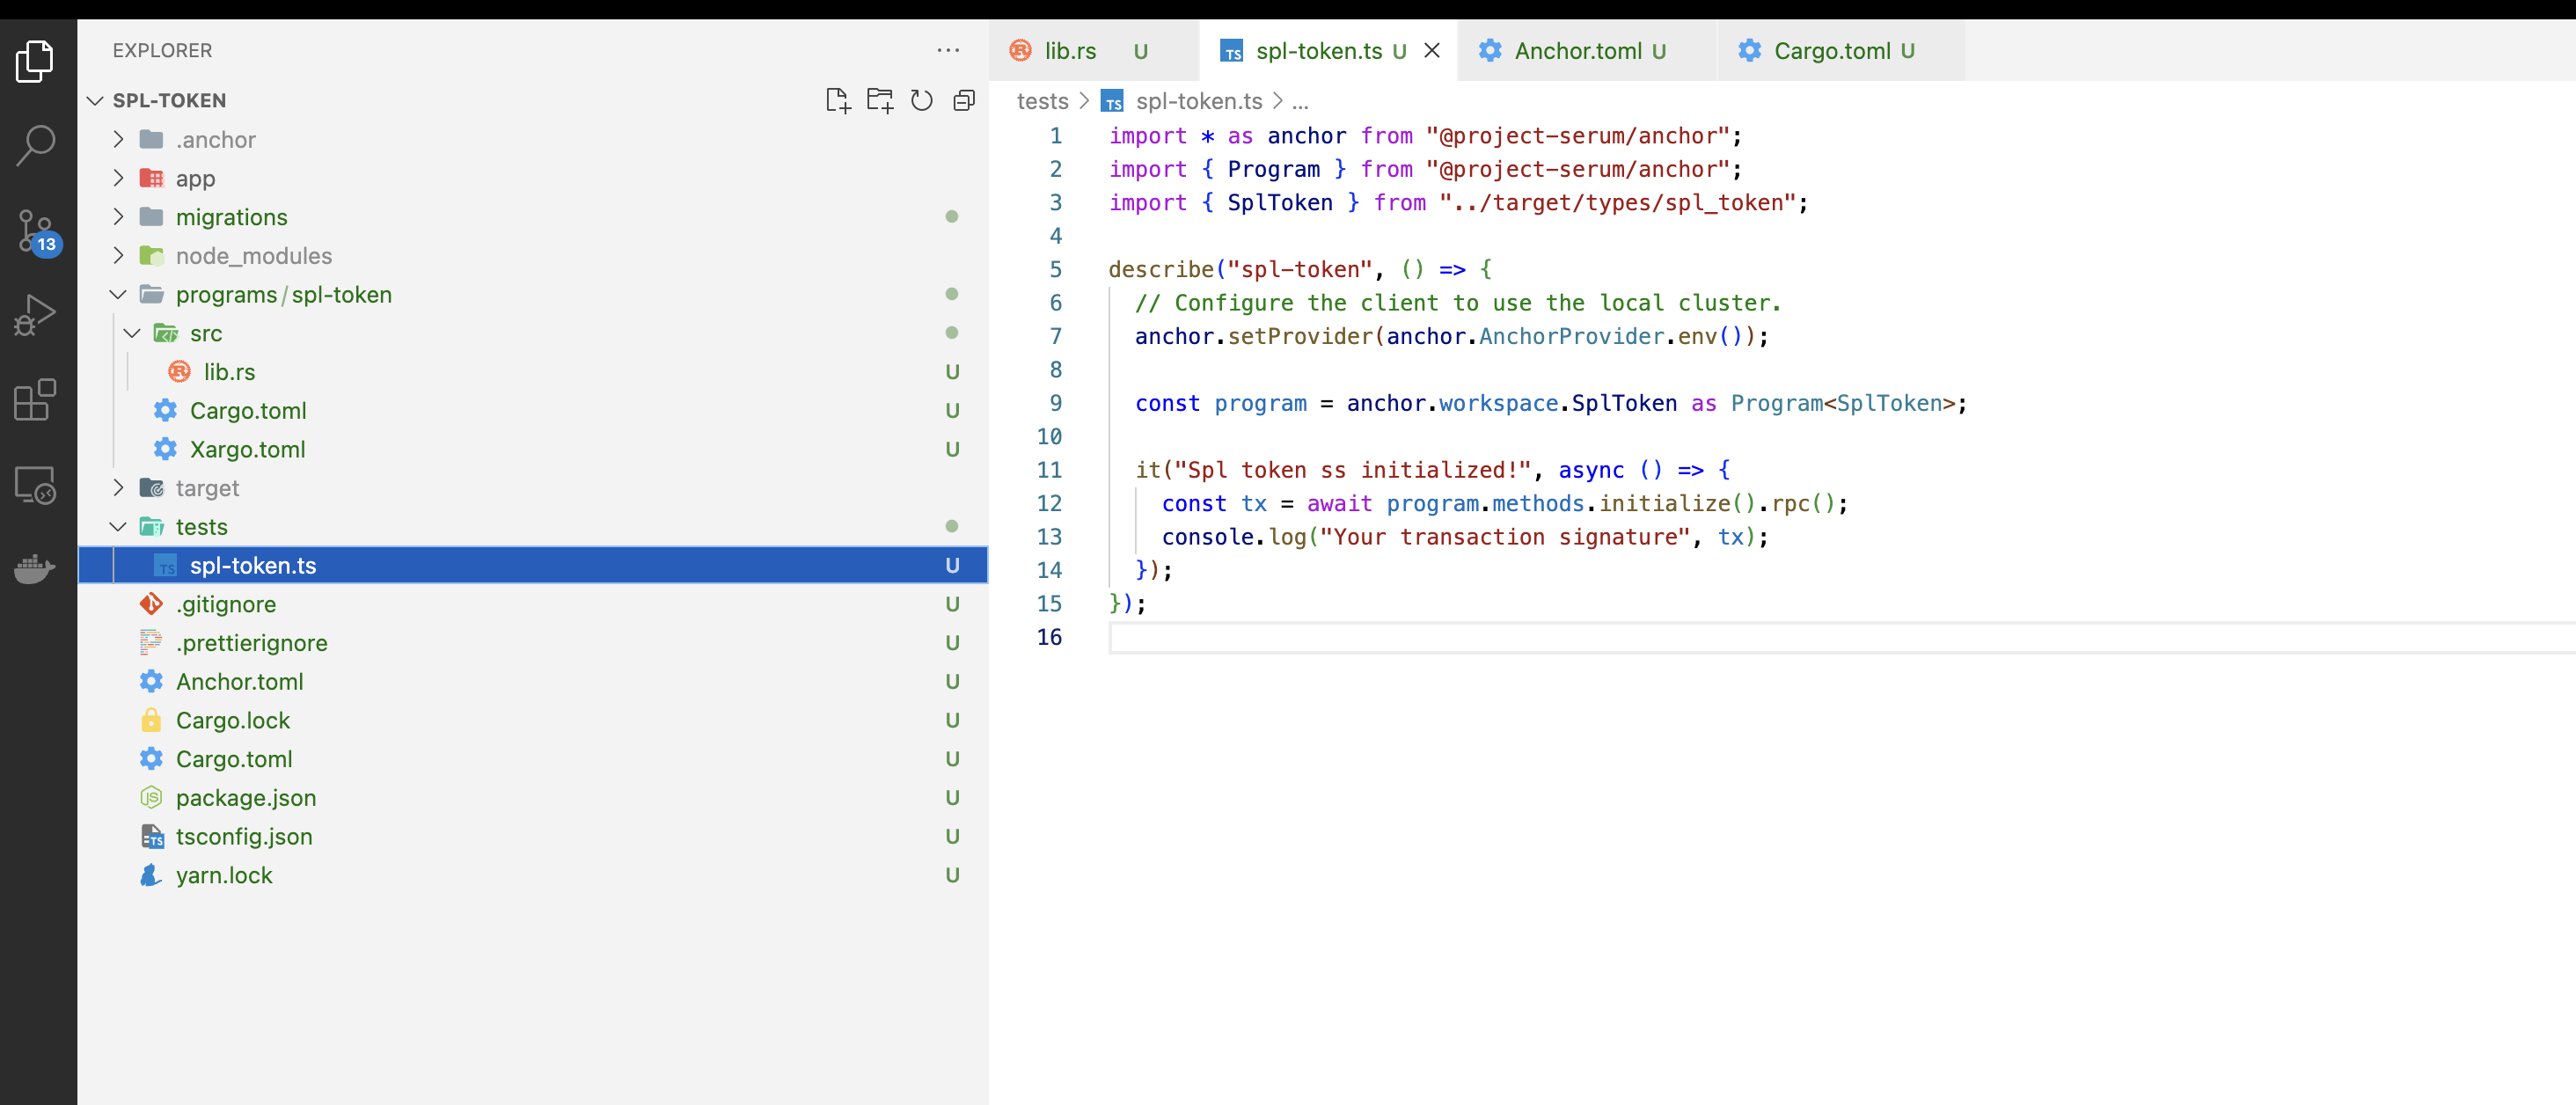
 it("Spl token is initialized!", async () => {
    const [splTokenMint, _1] = await findSplTokenMintAddress();

    const [vaultMint, _2] = await findVaultAddress();

    const tx = await program.methods
      .createMint()
      .accounts({
        splTokenMint: splTokenMint,
        vault: vaultMint,
        payer: payer.publicKey,
        tokenProgram: TOKEN_PROGRAM_ID,
        systemProgram: SystemProgram.programId,
      })
      .signers([payer])
      .rpc();

    const vaultData = await program.account.vault.fetch(vaultMint);

    assert(
      vaultData.splTokenMint.toString() === splTokenMint.toString(),
      "The spl token mint should be same"
    );

    console.log("Your transaction signature", tx);
  });
To test, run the command
anchor test
You should be able to see the output as below. Now, we have successfully created a mint and tested it out.
How to transfer the Minted token to an account?
Before transferring an spl_token_mint to an account, it is time to understand about Associated Token Account (ATA).
The spl_token_mint can only be transferred to ATA.
- ATA is normally generated off-chain.
- ATA is PDA. ATA is generated by finding a suitable PDA
- On the client side, one could generate a ATA as follows
Following code is an example ATA generation using PublicKey.findProgramAddress in @solana/web3.js library.
Add find ATA to test file
Add the following in the spl-token.ts test file.
import {PublicKey} from "@solana/web3.js"
import { ASSOCIATED_TOKEN_PROGRAM_ID, TOKEN_PROGRAM_ID } from "@solana/spl-token";

export const findAssociatedTokenAccount = async (
  payerKey: PublicKey,
  mintKey: PublicKey
) => {

  return await PublicKey.findProgramAddress(
    [
      payerKey.toBuffer(), // could be any public key
      TOKEN_PROGRAM_ID.toBuffer(),
      mintKey.toBuffer(),
    ],
   ASSOCIATED_TOKEN_PROGRAM_ID
  );
};
As we can see above, ATA is generated using
- Any public address +
- A mint address +
- Token program ID address +
- Associated Token Program ID.
You should pass ATA to an instruction to transfer a mint. In the program, use mint_to instruction to transfer a newly created mint.
Now, back in the rust lib.rs file, we will write a transfer context and then we will write an instruction to transfer the spl-token-mint` to an ATA.
How to create transfer context?
We create another struct called TransferMint context for transfer_mint instruction.
First update the imports from token library
use anchor_spl::{token::{self, Mint, Token, TokenAccount}, associated_token::AssociatedToken};
Next create the TransferMint context.
// Transfer mint context
#[derive(Accounts)]
pub struct TransferMint<'info> {
    #[account(
        mut,
         seeds = [
            b"spl-token-mint".as_ref(),
         ],
        bump = vault.spl_token_mint_bump,
    )]
    pub spl_token_mint: Account<'info, Mint>, // ---> 1

    #[account(
        seeds = [
            b"vault"
        ],
        bump = vault.bump, // --> 2
    )]
    pub vault : Account<'info, Vault>,

    #[account(
        init,
        payer = payer,
        associated_token::mint = spl_token_mint,
        associated_token::authority = payer
    )]
    pub payer_mint_ata: Box<Account<'info, TokenAccount>>,  // --> 3

    #[account(mut)]
    pub payer: Signer<'info>, // ---> 4

    pub system_program: Program<'info, System>, // ---> 5
    pub token_program: Program<'info, Token>,   // ---> 6

    pub rent: Sysvar<'info, Rent>, // ---> 7

    pub associated_token_program : Program<'info, AssociatedToken>  // ---> 8

}
So here is what's happening the TransferMint context
- We have used the same
spl_token_mintaccount. However, we are not instantiating this time. We use thespl_token_mint_bumpthat was stored inVaultstate previously. - We get the
vaultaccount again by using storedbumpfrom theVaultstate - This time, we are passing an ATA for minting the
spl_token_mintinto thepayer_mint_ataaccount. We are settingassociated_token::minttospl_token_mintandassociated_token::authoritytopayeraccount. - We are passing the
payeraccount from which the program deducts payment token_programaccount is same as beforesystem_programaccount is same as described in the previouslyrentaccount is same as previously. Here we are passing rent for creatingassociated token accountassociated_token_programaccount is passed for creating ATA.
We will now create an instruction transfer_mint to transfer the spl_token_mint into an ATA.
We use the mint_to instruction from token_program. We will call the instruction via cross program invocation (CPI) to another program. Learn more about this here
    pub fn transfer_mint(ctx : Context<TransferMint>) -> Result<()> {
        let cpi_context = CpiContext::new(
            ctx.accounts.token_program.to_account_info(),
            token::MintTo {
                mint: ctx.accounts.spl_token_mint.to_account_info(),
                to: ctx.accounts.payer_mint_ata.to_account_info(),
                authority: ctx.accounts.payer.to_account_info(),
            },
        );
        token::mint_to(cpi_context, 10)?; // we are minting 10 tokens
        Ok(())
    }
With this, the spl_token_mint is minted into the payer_mint_ata account.
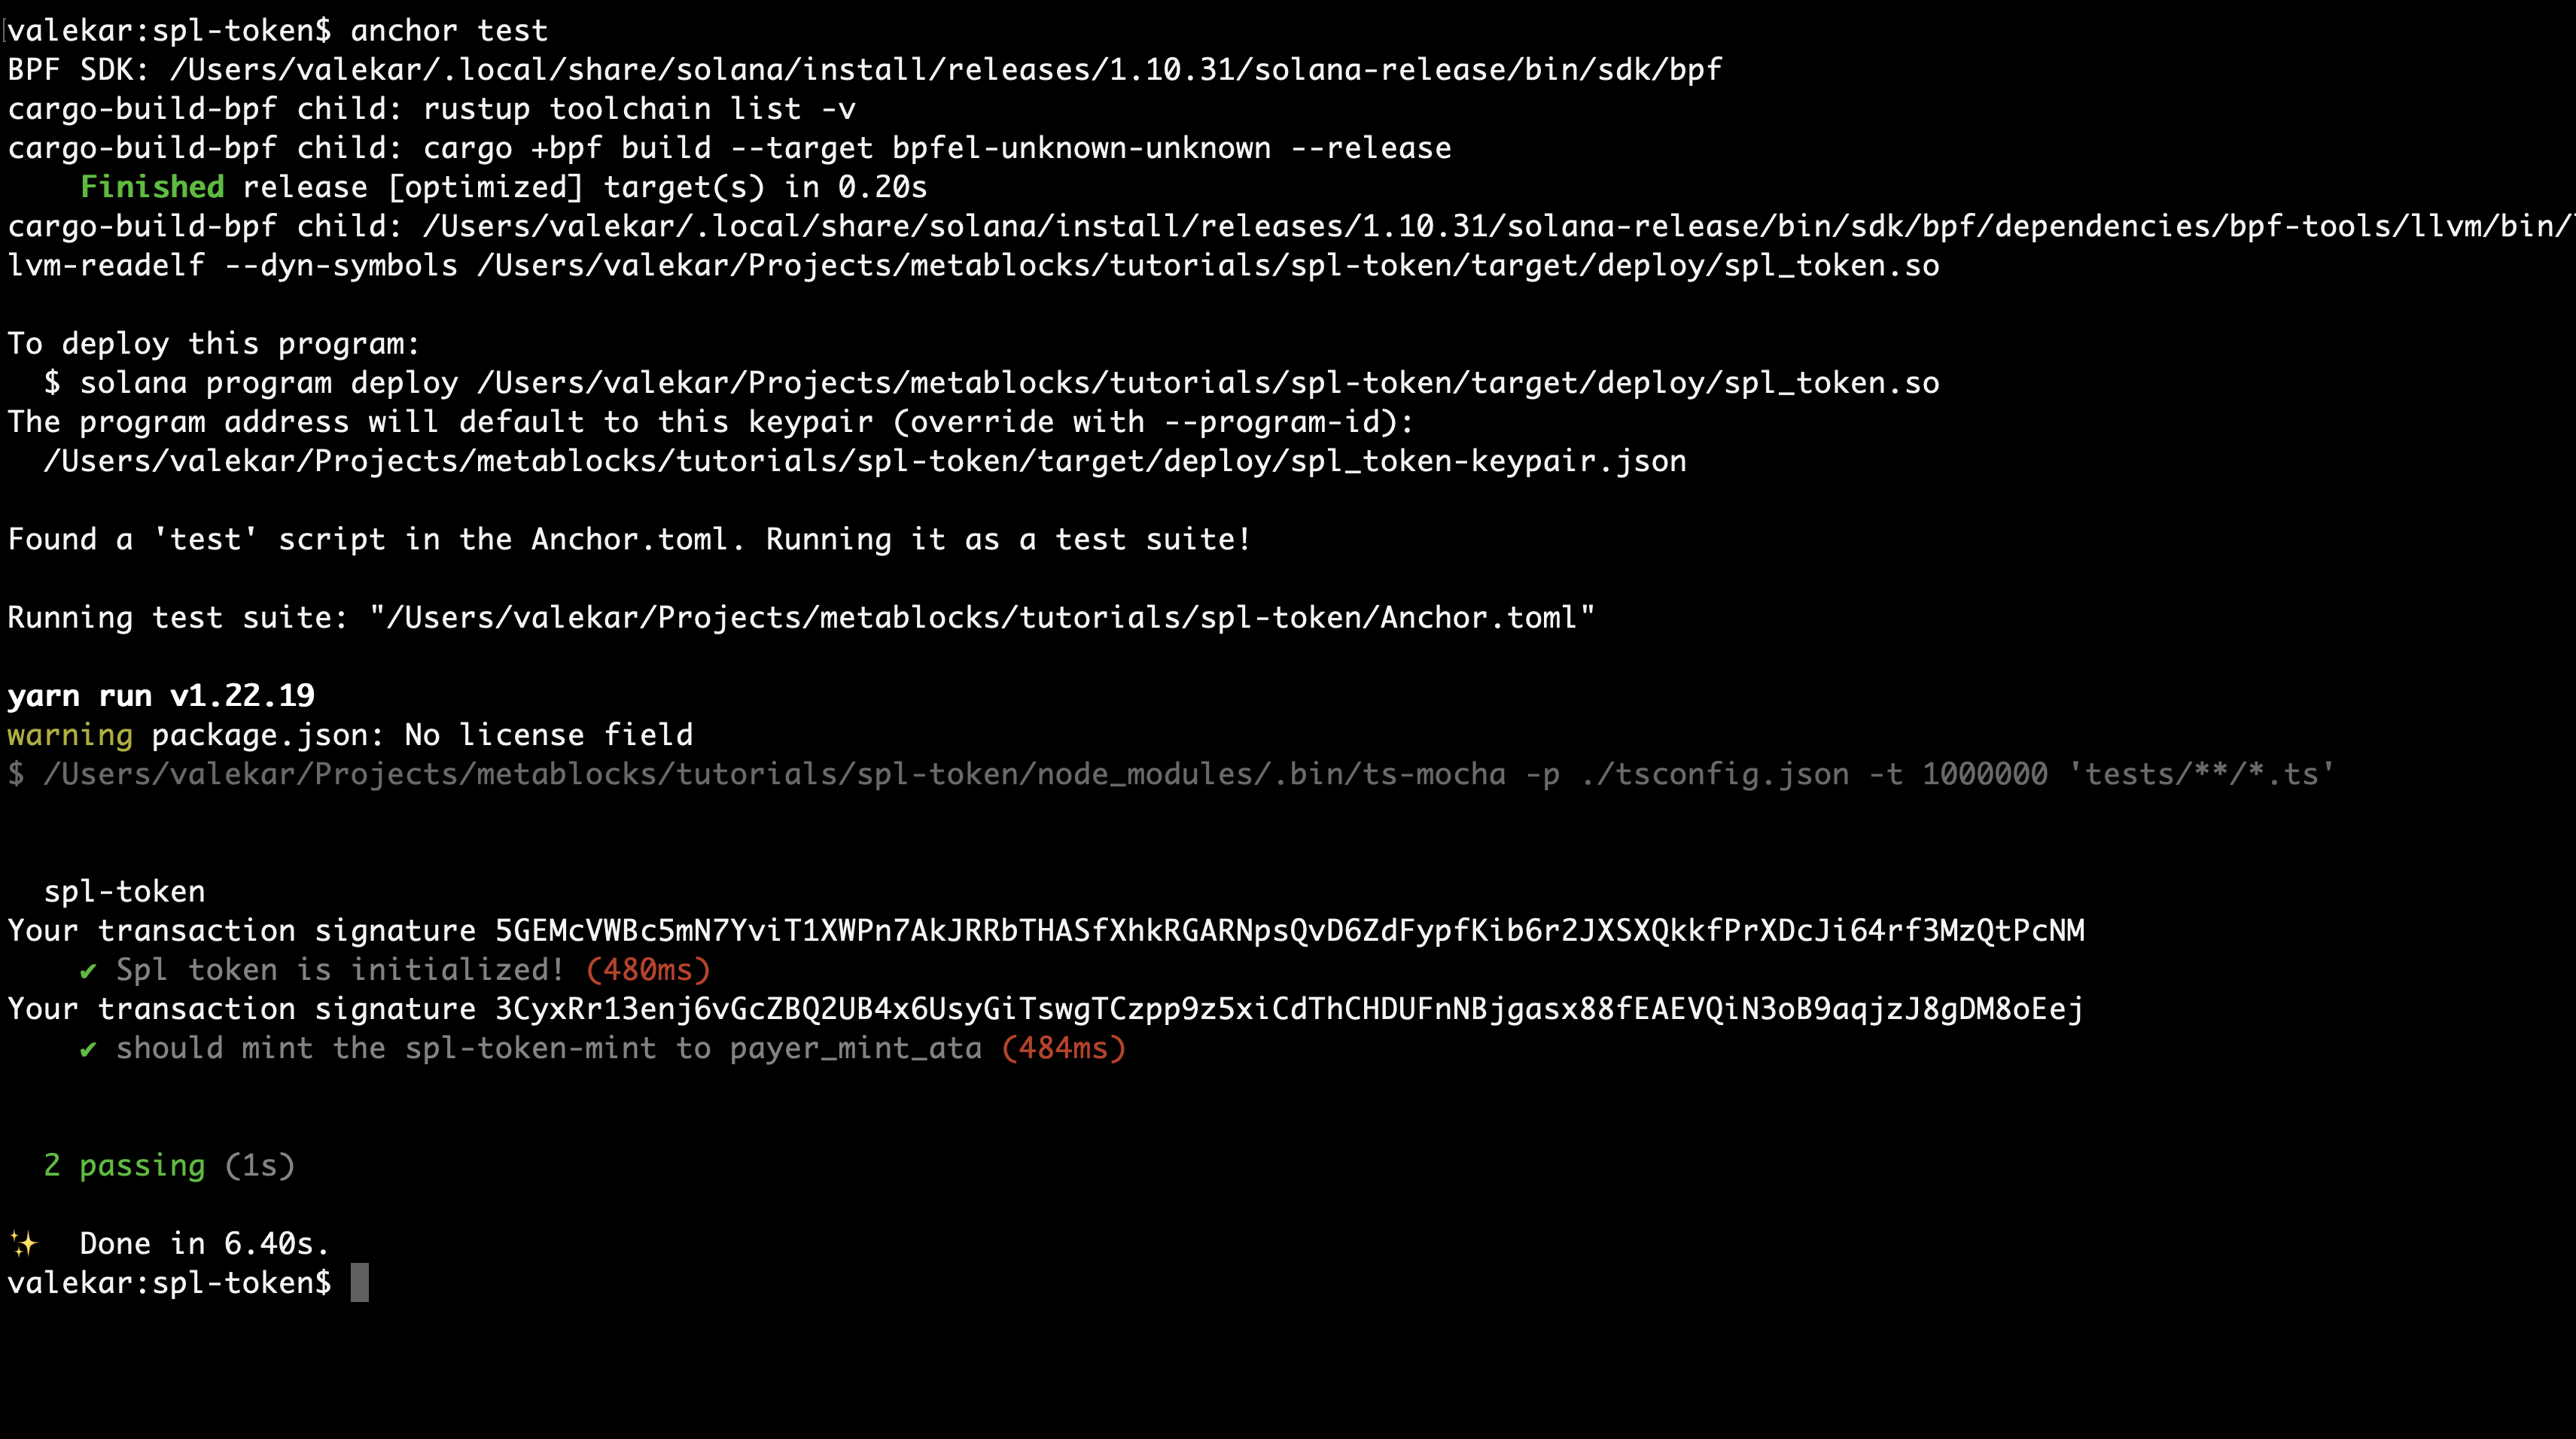
Let us test this out by writing another test case in spl-token.ts file. Let's update the file like it shown below.
// add this block into the describe block of the test file
it("should mint the spl-token-mint to payer_mint_ata", async () => {
    const [splTokenMint, _1] = await findSplTokenMintAddress();

    const [vaultMint, _2] = await findVaultAddress();

    const [payerMintAta, _3] = await findAssociatedTokenAccount(
      payer.publicKey,
      splTokenMint
    );

    const tx = await program.methods
      .transferMint()
      .accounts({
        splTokenMint: splTokenMint,
        vault: vaultMint,
        associatedTokenProgram: ASSOCIATED_TOKEN_PROGRAM_ID,
        tokenProgram: TOKEN_PROGRAM_ID,
        systemProgram: SystemProgram.programId,
        payerMintAta: payerMintAta,
        payer: payer.publicKey,
      })
      .signers([payer])
      .rpc();

    console.log("Your transaction signature", tx);
  });
Run the command
anchor test
After this, you should be able to see the result like below.
How to transfer a token to other account?
So far, we have created a mint and minted it to an account. But how to transfer the mint to other accounts?
It also involves the same process. Create a TransferTokenToAnother context and create an instruction transfer_token_to_another to achieve the end goal.
How to create a TransferTokenToAnother context?
Below is the struct that we define for transferring a spl_token_mint token to other account.
// Transfer token to another account
#[derive(Accounts)]
pub struct TransferTokenToAnother<'info> {
    #[account(
         seeds = [
            b"spl-token-mint".as_ref(),
         ],
        bump = vault.spl_token_mint_bump,
    )]
    pub spl_token_mint: Account<'info, Mint>, // ---> 1

    #[account(
        seeds = [
            b"vault"
        ],
        bump = vault.bump, // --> 2
    )]
    pub vault : Account<'info, Vault>,

    #[account(
        mut,
        associated_token::mint = spl_token_mint,
        associated_token::authority = payer
    )]
    pub payer_mint_ata: Box<Account<'info, TokenAccount>>,  // --> 3

    #[account(mut)]
    pub payer: Signer<'info>, // ---> 4

    pub system_program: Program<'info, System>, // ---> 5
    pub token_program: Program<'info, Token>,   // ---> 6

    pub rent: Sysvar<'info, Rent>, // ---> 7

    pub associated_token_program : Program<'info, AssociatedToken>,  // ---> 8


    #[account(
        init,
        payer = payer,
        associated_token::mint = spl_token_mint,
        associated_token::authority = payer
    )]
    pub another_mint_ata: Box<Account<'info, TokenAccount>>,  // --> 9

    /// CHECK : We just pass the account info for the demonstration purpose. Ideally this is either signer or trusted account
    pub another_account : AccountInfo<'info> // ---> 10

}
- We pass the
spl_token_mintaccount without anymutorinitdecoration. - We pass the
vault. This can be used for security purpose. payer_mint_ataaccount from which we are transferring token to another atapayersigner who is transferring the tokensystem_programaccount for executing the instruction.token_programaccount used for performingtransferoperationinitdecorator usesrentaccount for creating account- We are creating a new ata account. Hence we pass
associated_token_program another_mint_ataaccount to which we transfer the token.another_accountaccount is the owner ofanother_mint_ata
Create a transfer_token_to_another instruction for transferring a token.
    pub fn transfer_token_to_another(ctx : Context<TransferTokenToAnother>) -> Result<()> {
        let cpi_context = CpiContext::new(
            ctx.accounts.token_program.to_account_info(),
            token::Transfer {
                from : ctx.accounts.payer_mint_ata.to_account_info(),
                to : ctx.accounts.another_mint_ata.to_account_info(),
                authority : ctx.accounts.payer.to_account_info()
            },
        );
        token::transfer(cpi_context, 1)?;
        Ok(())
    }
Time to test the transfer_token_to_another instruction.
Let us first create anotherWallet and add it to the root of the test case.
const anotherWallet = anchor.web3.Keypair.generate();
And add some sols to the wallet using addSols function in before function block.
  before("Add sols to wallet ", async () => {
    await addSols(provider, payer.publicKey);
    await addSols(provider, anotherWallet.publicKey); // add sols to another wallet
  });
We will test case in spl-token.ts. Add the following in your test file.
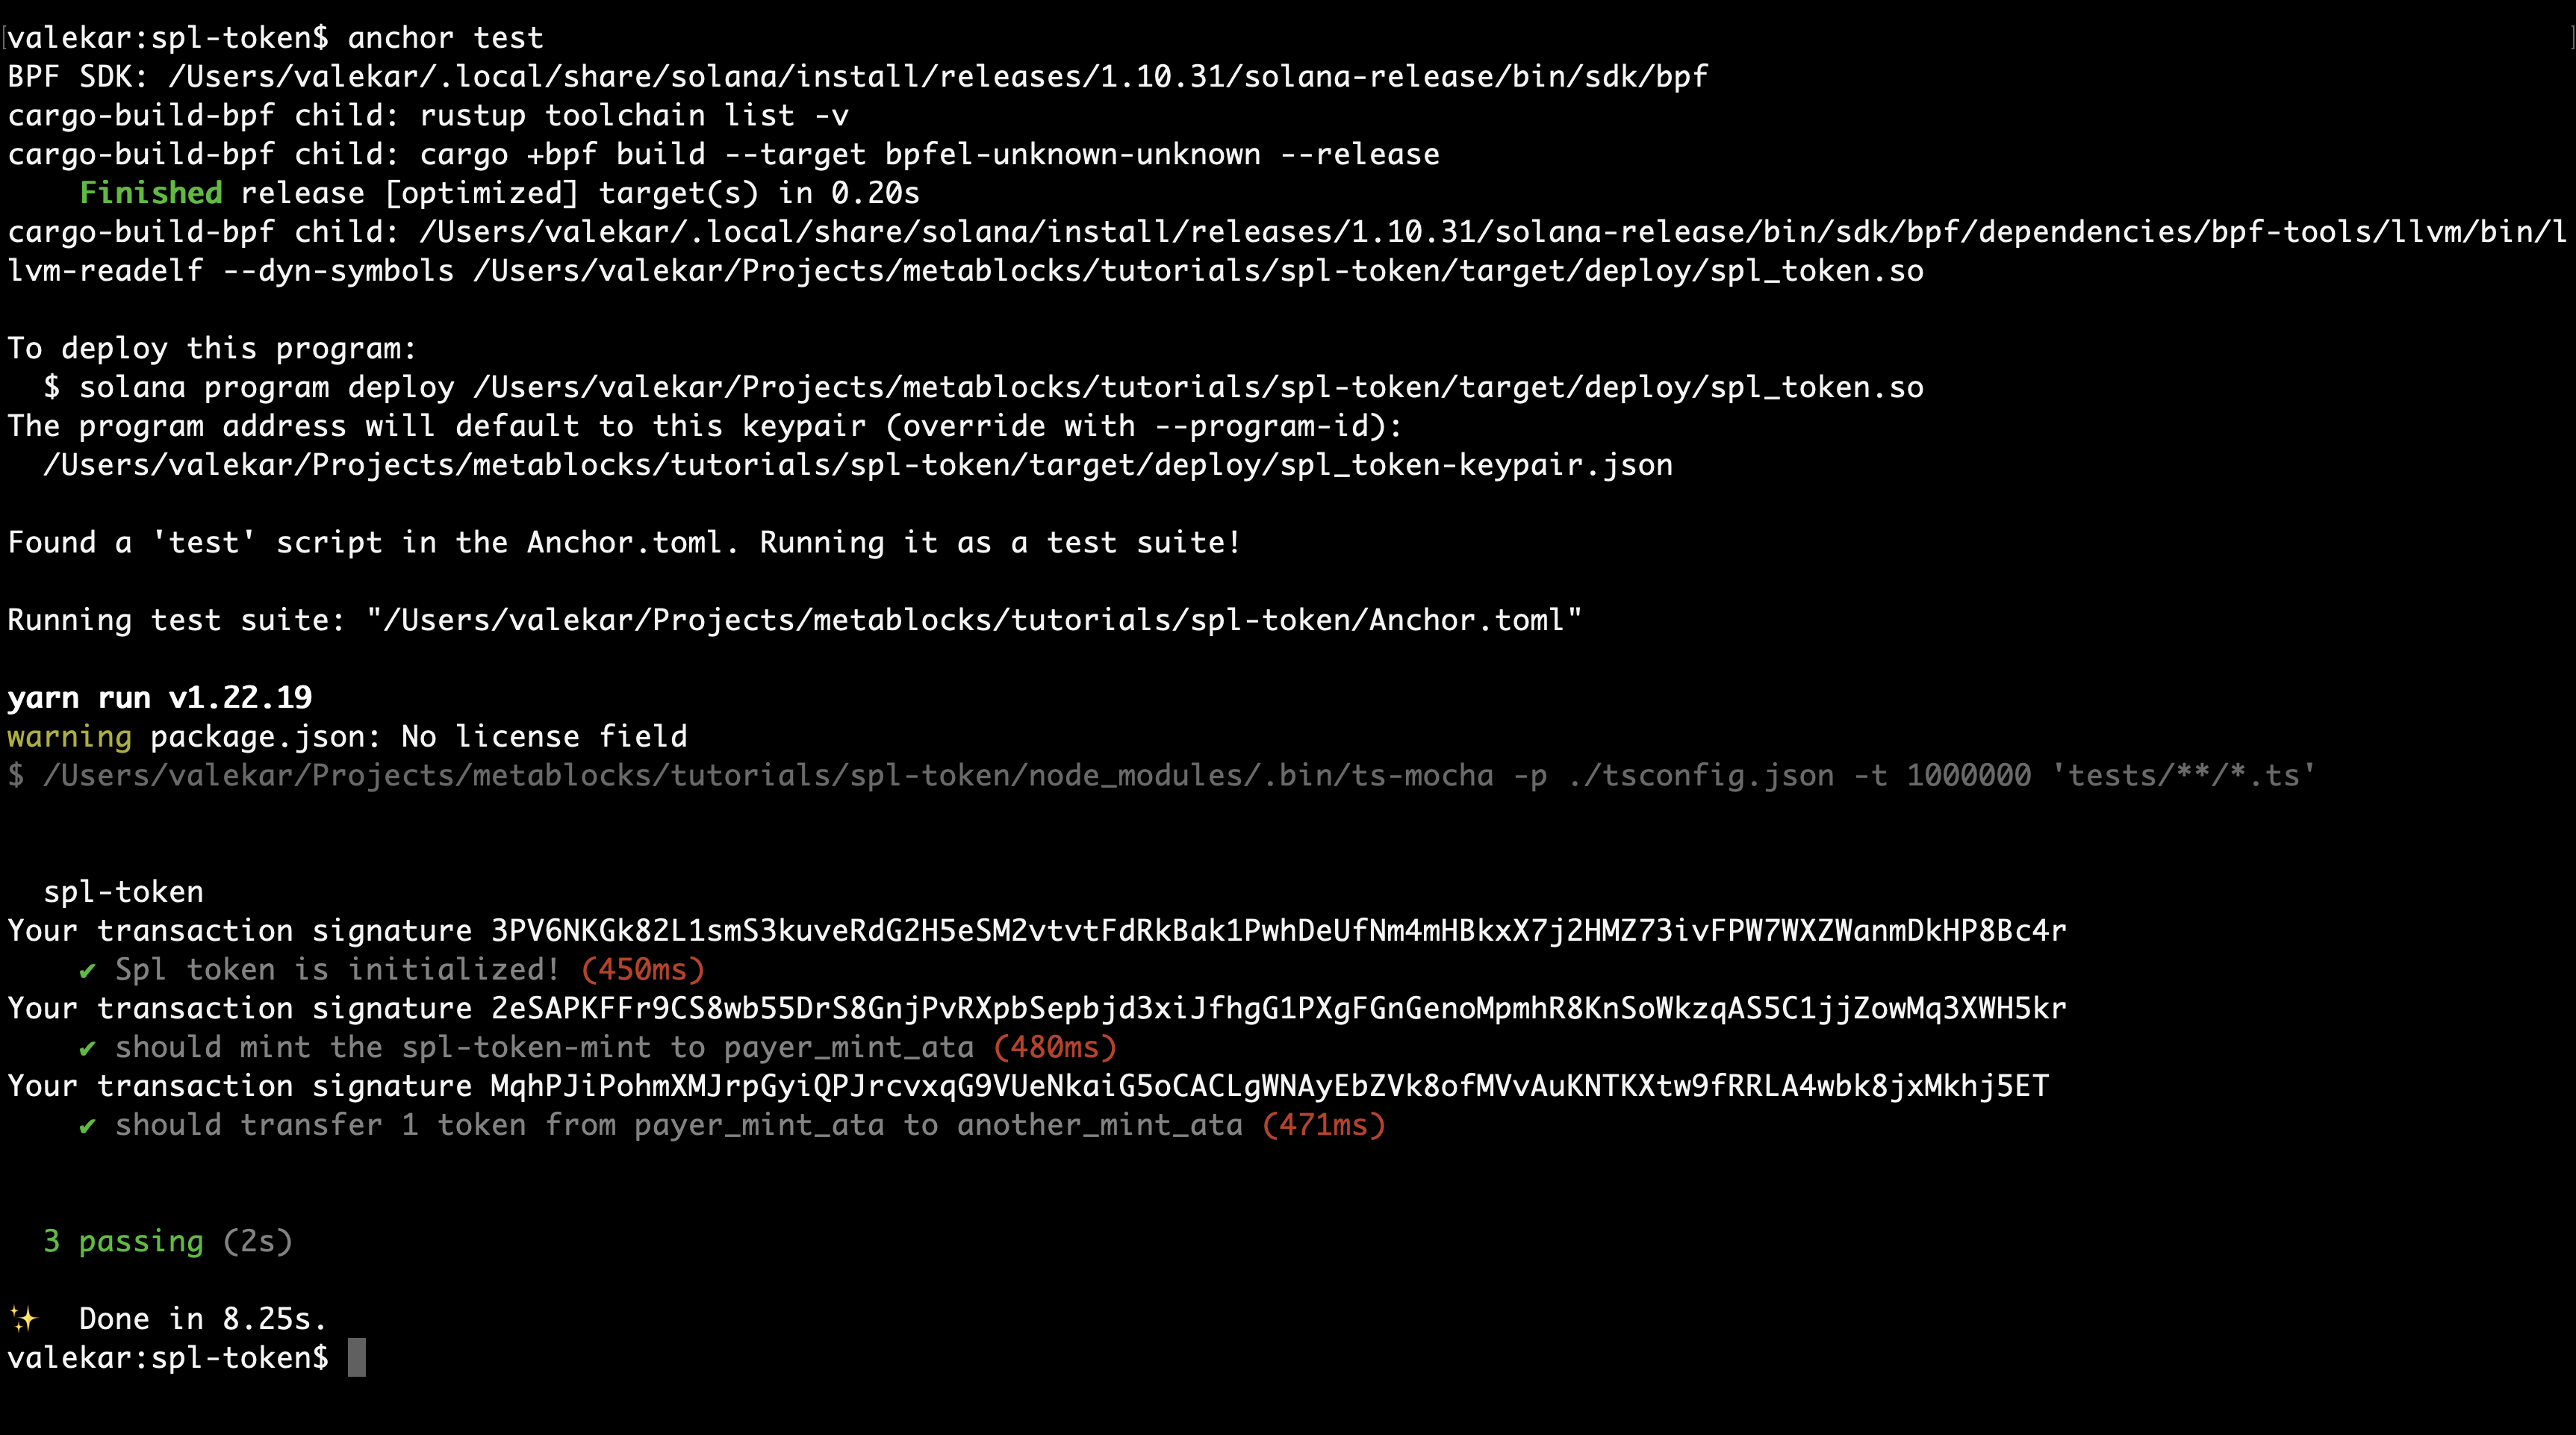
  it("should transfer 1 token from payer_mint_ata to another_mint_ata", async () => {
    try {

      const [splTokenMint, _1] = await findSplTokenMintAddress();

      const [vaultMint, _2] = await findVaultAddress();

      const [payerMintAta, _3] = await findAssociatedTokenAccount(
        payer.publicKey,
        splTokenMint
      );

      const [anotherMintAta, _4] = await findAssociatedTokenAccount(
        anotherWallet.publicKey,
        splTokenMint
      );

      const tx = await program.methods
        .transferTokenToAnother()
        .accounts({
          splTokenMint: splTokenMint,
          vault: vaultMint,
          associatedTokenProgram: ASSOCIATED_TOKEN_PROGRAM_ID,
          tokenProgram: TOKEN_PROGRAM_ID,
          systemProgram: SystemProgram.programId,
          payerMintAta: payerMintAta,
          payer: payer.publicKey,
          anotherMintAta: anotherMintAta,
          rent: anchor.web3.SYSVAR_RENT_PUBKEY,
          anotherAccount: anotherWallet.publicKey,
        })
        .signers([payer])
        .rpc();

      console.log("Your transaction signature", tx);
    } catch (err) {
      console.log(err);
    }
  });
Run the command
anchor test
Then the output should be a success as shown below.
So, far we have understood how minting and transfer work. In the next sections we will discuss about other operations like freeze, thaw and burn operations.
How to freeze a token account ?
A freeze operation is done on a token account. This is so to prevent the transfer of tokens.
Only spl_token_mint authority can perform this action. Hence only payer can perform this action.
This also involves the same process.
- Create a
FreezeTokencontext - Then write an instruction for freezing the token.
How to create a FreezeTokenAccount context ?
Let's create a FreezeTokenAccount context using the struct
// Freeze token account
#[derive(Accounts)]
pub struct FreezeTokenAccount<'info> {
    #[account(
        mut,
         seeds = [
            b"spl-token-mint".as_ref(),
         ],
        bump = vault.spl_token_mint_bump,
    )]
    pub spl_token_mint: Account<'info, Mint>, // ---> 1

    #[account(
        seeds = [
            b"vault"
        ],
        bump = vault.bump, // --> 2
    )]
    pub vault : Account<'info, Vault>,

    #[account(mut)]
    pub payer : Signer<'info>, // ---> 3


    #[account(
        mut,
        associated_token::mint = spl_token_mint,
        associated_token::authority = payer
    )]
    pub payer_mint_ata: Box<Account<'info, TokenAccount>>,  // --> 4

    pub system_program: Program<'info, System>, // ---> 5
    pub token_program: Program<'info, Token>,   // ---> 6

    pub rent: Sysvar<'info, Rent>, // ---> 7

    pub associated_token_program : Program<'info, AssociatedToken>,  // ---> 8

}
- We pass the
spl_token_mintaccount without anymutorinitdecoration. - We pass the vault. Again, this can be used for security purpose.
- We pass
payeras thesignerthis time. - We pass
payer_mint_atawhere we want tofreezethe account. system_programaccount for executing the instruction.token_programaccount used for performingfreezeoperationrentmight have to passed as we are usingassociated_token_programassociated_token_programaccount is passed for creating ATA.
We will now create an instruction freeze_token_account to freeze the token ATA account.
Let's update the import in lib.rs file.
use anchor_spl::{token::{self, Mint, Token, TokenAccount, FreezeAccount}, associated_token::AssociatedToken};
Then we add the instruction.
    pub fn freeze_token_account(ctx : Context<FreezeTokenAccount>) -> Result<()> {
        let cpi_context = CpiContext::new(
            ctx.accounts.token_program.to_account_info(),
            FreezeAccount {
                account : ctx.accounts.payer_mint_ata.to_account_info(),
                mint : ctx.accounts.spl_token_mint.to_account_info(),
                authority : ctx.accounts.payer.to_account_info()
            },
        );
        token::freeze_account(cpi_context)?;
        Ok(())
    }
As we can see above, we are doing a CPI call to token program to freeze the payer_mint_ata account.
The signature of freeze_account function is that is requires us to pass FreezeAccount struct as context.
Since we are calling token::freeze_account function from another program, we need to create a CPI context by using CpiContext::new function.
To test this out, let us add a test case in the spl-token.ts` test file.
  it("should freeze token account of payer wallet ", async () => {
    try {
      const [splTokenMint, _1] = await findSplTokenMintAddress();

      const [vaultMint, _2] = await findVaultAddress();

      const [payerMintAta, _3] = await findAssociatedTokenAccount(
        payer.publicKey,
        splTokenMint
      );

      const tx = await program.methods
        .freezeTokenAccount()
        .accounts({
          splTokenMint: splTokenMint,
          vault: vaultMint,
          associatedTokenProgram: ASSOCIATED_TOKEN_PROGRAM_ID,
          tokenProgram: TOKEN_PROGRAM_ID,
          systemProgram: SystemProgram.programId,
          payerMintAta: payerMintAta,
          rent: anchor.web3.SYSVAR_RENT_PUBKEY,
          payer: payer.publicKey,
        })
        .signers([payer])
        .rpc();

      console.log("Your transaction signature", tx);
    } catch (err) {
      console.log(err);
    }
  });
Now run the command
anchor test
You should be able to pass the test as seen below.
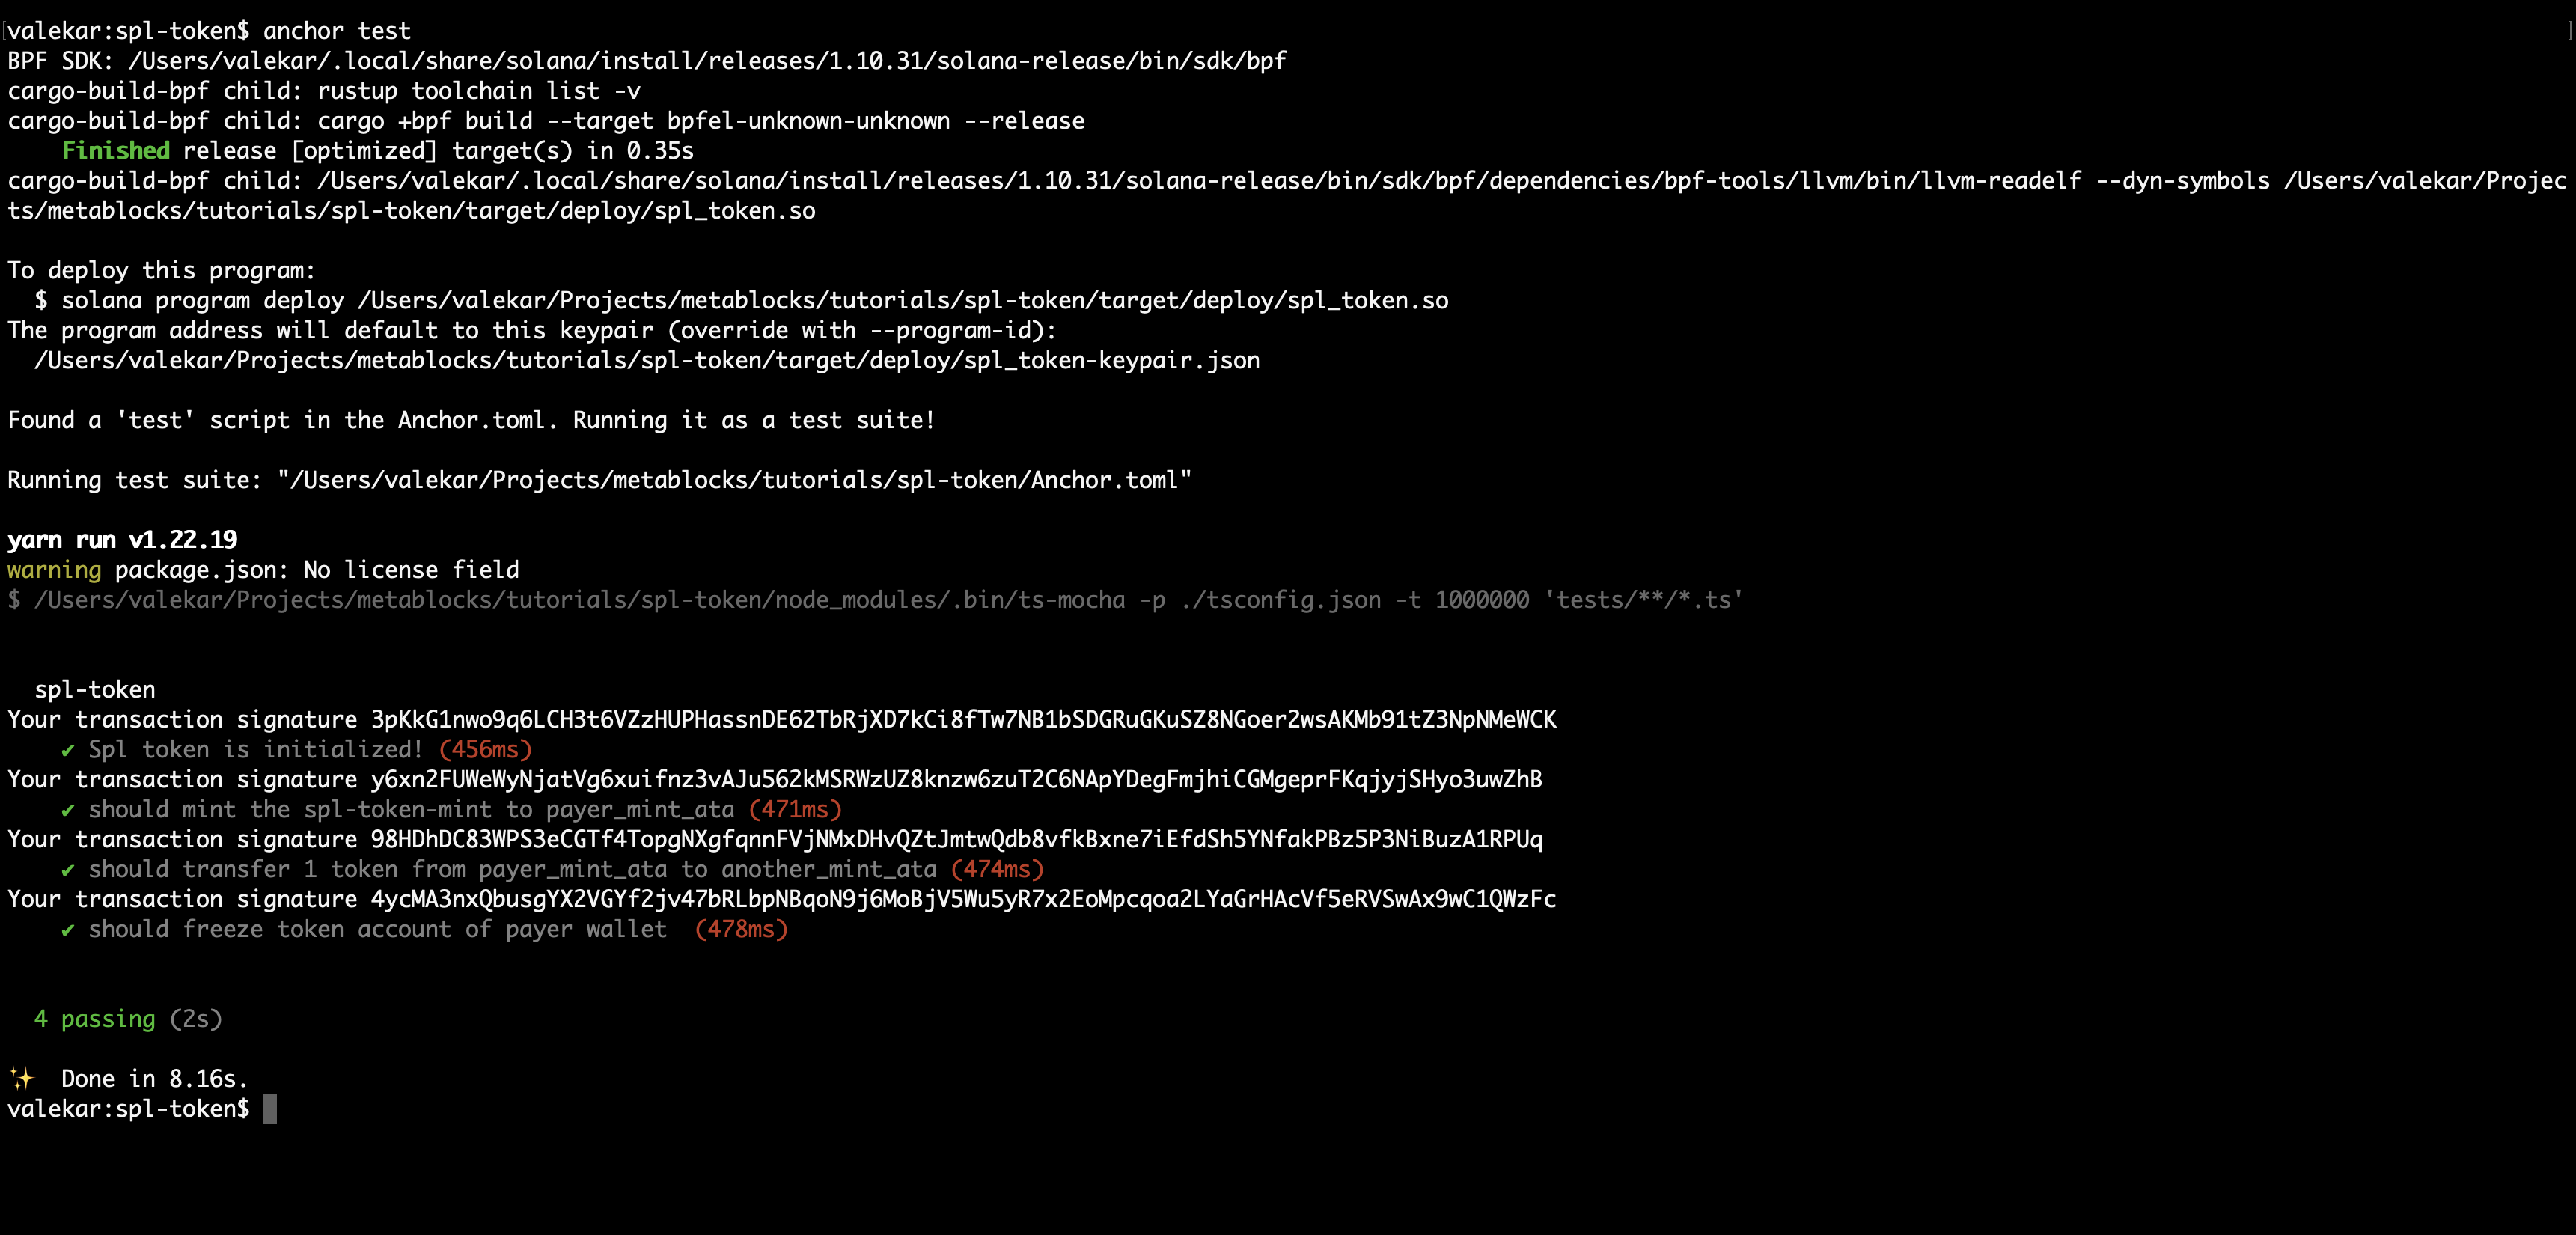
After freezing a token, how can one unfreeze a token account? Now us look at it in the following section.
How to Thaw (unfreeze) an account ?
A thaw operation is done on a token account to unfreeze a frozen account. Only spl_token_mint authority can perform this action. Hence only payer can perform this action.
This also involves the below process.
- Create a
UnfreezeTokenAccountcontext - Then write an instruction for freezing the token.
Let's create a UnfreezeTokenAccount context using the struct
// Unfreeze token account
#[derive(Accounts)]
pub struct UnfreezeTokenAccount<'info> {
    #[account(
        mut,
         seeds = [
            b"spl-token-mint".as_ref(),
         ],
        bump = vault.spl_token_mint_bump,
    )]
    pub spl_token_mint: Account<'info, Mint>, // ---> 1

    #[account(
        seeds = [
            b"vault"
        ],
        bump = vault.bump, // --> 2
    )]
    pub vault : Account<'info, Vault>,

    #[account(mut)]
    pub payer : Signer<'info>, // ---> 3


    #[account(
        mut,
        associated_token::mint = spl_token_mint,
        associated_token::authority = payer
    )]
    pub payer_mint_ata: Box<Account<'info, TokenAccount>>,  // --> 4

    pub system_program: Program<'info, System>, // ---> 5
    pub token_program: Program<'info, Token>,   // ---> 6

    pub rent: Sysvar<'info, Rent>, // ---> 7

    pub associated_token_program : Program<'info, AssociatedToken>,  // ---> 8
}
- We pass the
spl_token_mintaccount without anymutorinitdecoration. - We pass the vault. Again, this can be used for security purpose.
- We pass
payeras thesignerthis time. - We pass
payer_mint_atawhere we want tofreezethe account. system_programaccount for executing the instruction.token_programaccount used for performingfreezeoperationrentmight have to passed as we are usingassociated_token_programassociated_token_programaccount is passed for creating ATA.
We will now create an instruction unfreeze_token_account to unfreeze the token account.
Let's update the import in lib.rs file.
use anchor_spl::{token::{self, Mint, Token, TokenAccount, FreezeAccount, ThawAccount}, associated_token::AssociatedToken};
Add the unfreeze_token_account instruction.
    pub fn unfreeze_token_account(ctx : Context<UnfreezeTokenAccount>) -> Result<()> {
        let cpi_context = CpiContext::new(
            ctx.accounts.token_program.to_account_info(),
            ThawAccount {
                account : ctx.accounts.payer_mint_ata.to_account_info(),
                mint : ctx.accounts.spl_token_mint.to_account_info(),
                authority : ctx.accounts.payer.to_account_info()
            },
        );
        token::thaw_account(cpi_context)?;
        Ok(())
    }
Add a test case in spl-token.ts to test unfreeze instruction.
  it("should unfreeze token account of payer wallet ", async () => {
    try {
      const [splTokenMint, _1] = await findSplTokenMintAddress();

      const [vaultMint, _2] = await findVaultAddress();

      const [payerMintAta, _3] = await findAssociatedTokenAccount(
        payer.publicKey,
        splTokenMint
      );

      const tx = await program.methods
        .unfreezeTokenAccount()
        .accounts({
          splTokenMint: splTokenMint,
          vault: vaultMint,
          associatedTokenProgram: ASSOCIATED_TOKEN_PROGRAM_ID,
          tokenProgram: TOKEN_PROGRAM_ID,
          systemProgram: SystemProgram.programId,
          payerMintAta: payerMintAta,
          rent: anchor.web3.SYSVAR_RENT_PUBKEY,
          payer: payer.publicKey,
        })
        .signers([payer])
        .rpc();

      console.log("Your transaction signature", tx);
    } catch (err) {
      console.log(err);
    }
  });
Run the command
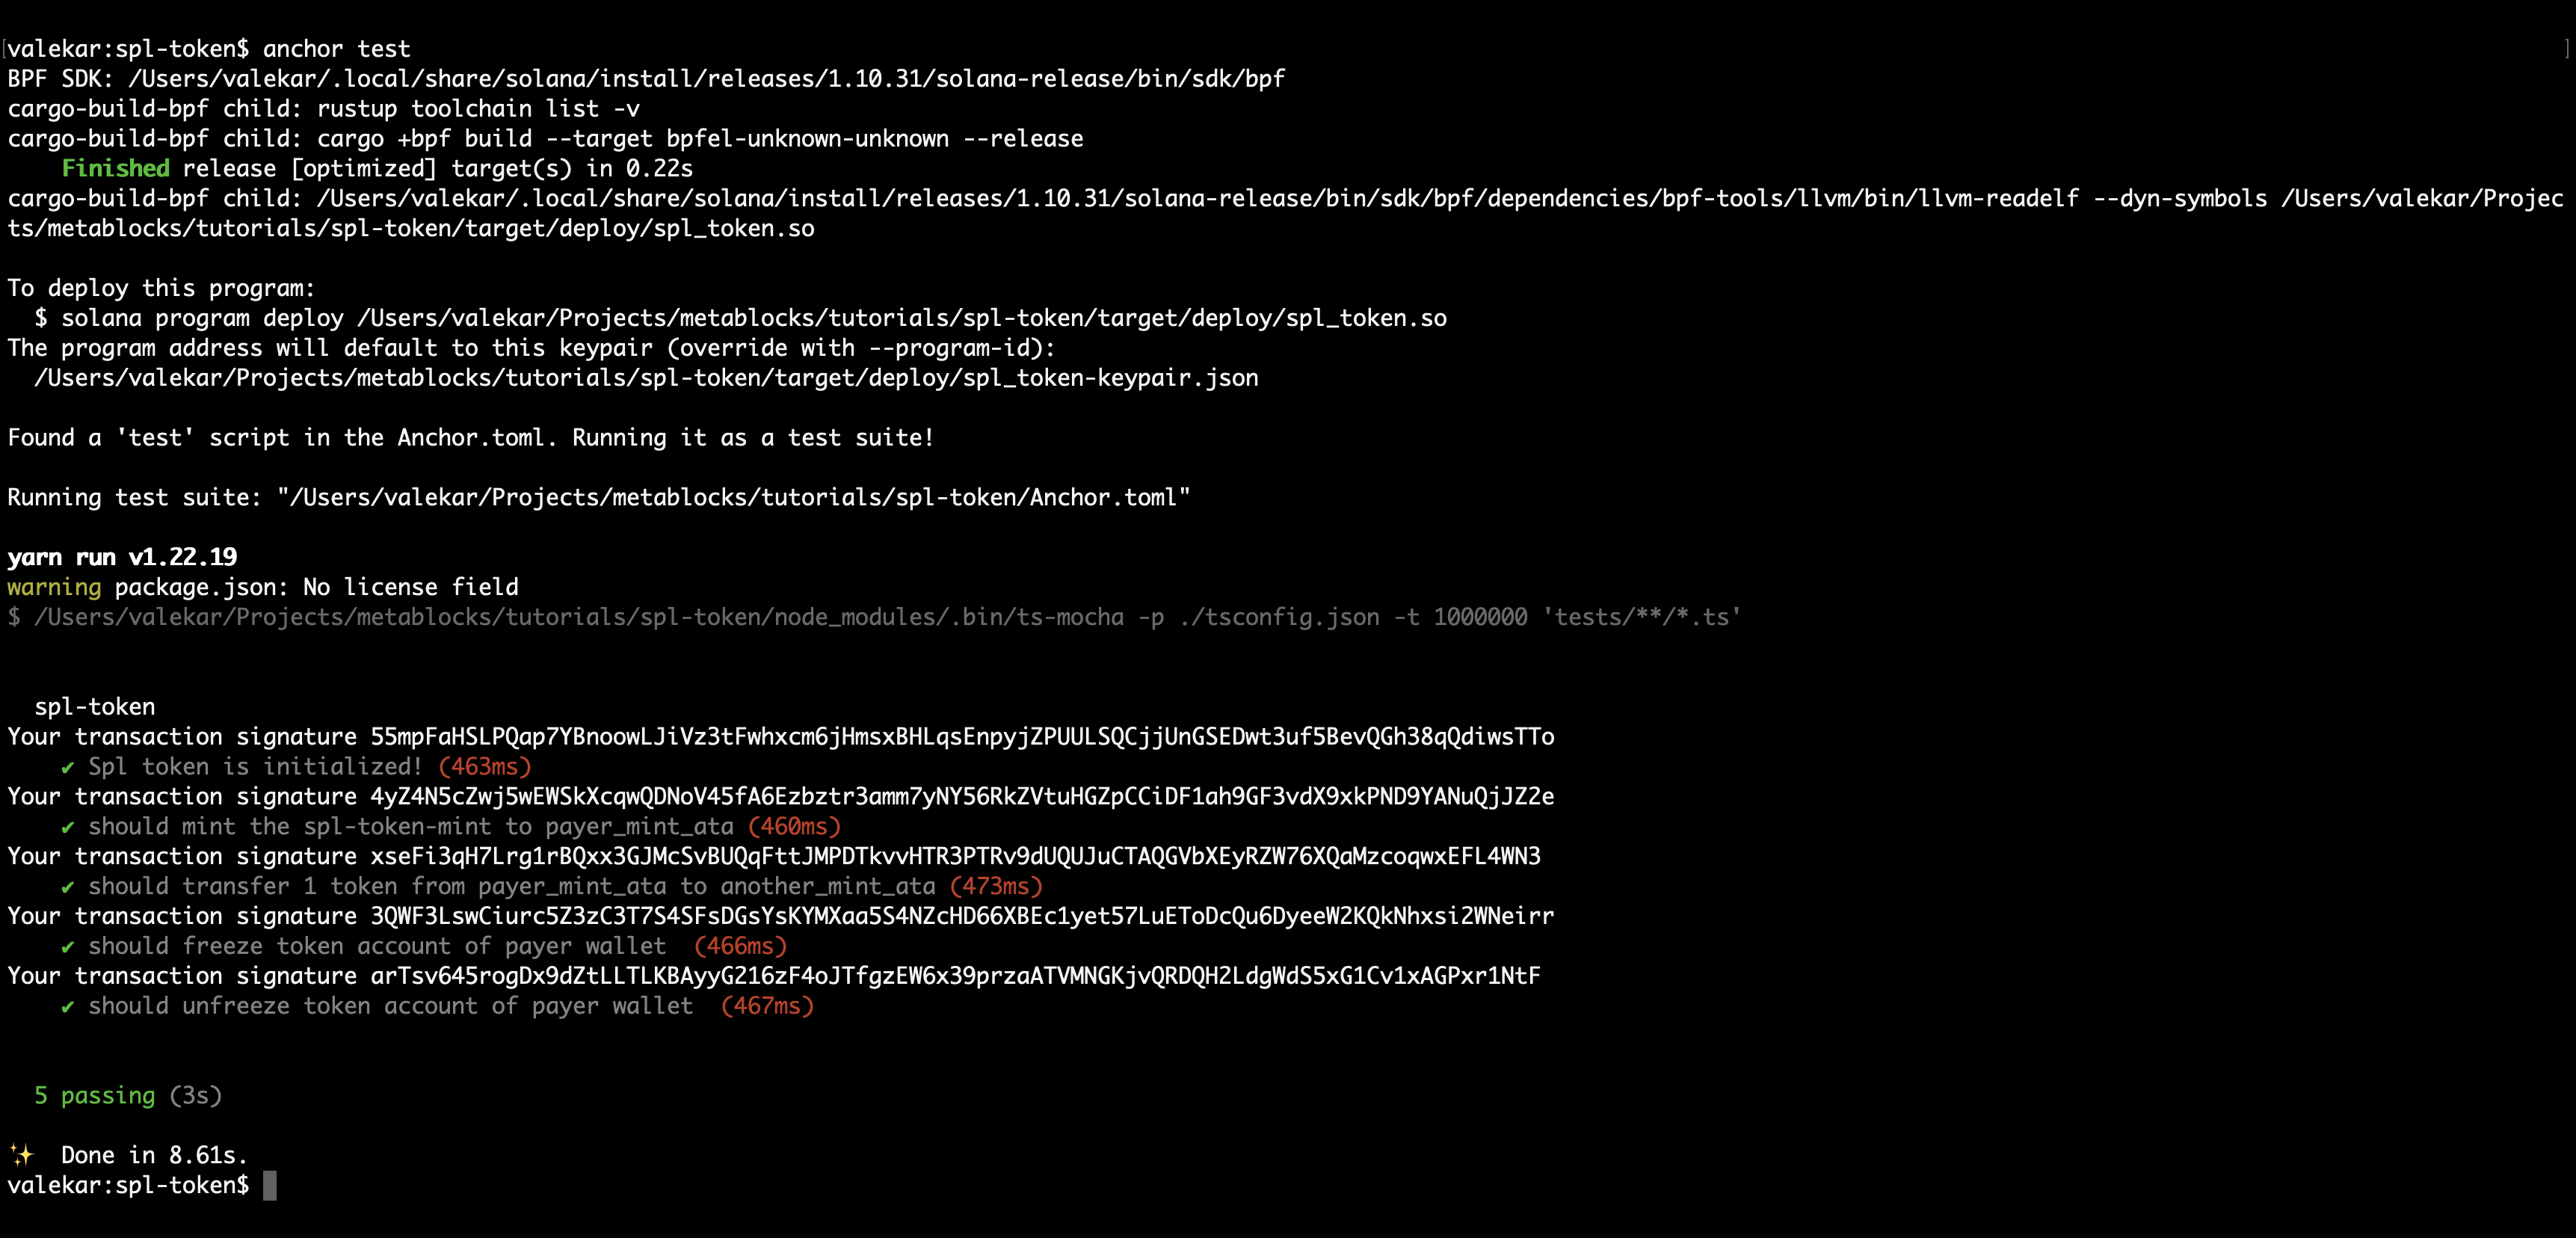
anchor test
You should see a successful test run.
Suppose, if there arises a need to destroy a minted token, how do we achieve that? In the next section we will go through burning a token.
How to burn tokens ?
We use burn instruction from token_program to destroy minted tokens. Again, only spl_token_mint` authority can perform this action.
Let us follow the 2-step process to burn a token.
- Create a
BurnTokencontext - Write a
burn_tokeninstruction to performburnaction.
How to create a BurnToken context ?
Create a BurnToken context using the struct in lib.rs file.
In this code, we burn a token from payer_mint_ata account.
// Burn token
#[derive(Accounts)]
pub struct BurnToken<'info> {
    #[account(
        mut,
         seeds = [
            b"spl-token-mint".as_ref(),
         ],
        bump = vault.spl_token_mint_bump,
    )]
    pub spl_token_mint: Account<'info, Mint>, // ---> 1

    #[account(
        seeds = [
            b"vault"
        ],
        bump = vault.bump, // --> 2
    )]
    pub vault : Account<'info, Vault>,

    #[account(mut)]
    pub payer : Signer<'info>, // ---> 3


    #[account(
        mut,
        associated_token::mint = spl_token_mint,
        associated_token::authority = payer
    )]
    pub payer_mint_ata: Box<Account<'info, TokenAccount>>,  // --> 4

    pub system_program: Program<'info, System>, // ---> 5
    pub token_program: Program<'info, Token>,   // ---> 6

    pub rent: Sysvar<'info, Rent>, // ---> 7

    pub associated_token_program : Program<'info, AssociatedToken>,  // ---> 8
}
- We pass the
spl_token_mintaccount without anymutorinitdecoration. - We pass the
vault. Again, this can be used for security purpose. - We pass
payeras thesignerthis time. - We pass
payer_mint_atawhere we want tofreezethe account. system_programaccount for executing the instruction.token_programaccount used for performingfreezeoperationrentmight have to passed as we are usingassociated_token_programassociated_token_programaccount is passed for creating ATA.
With this context, we can invoke a burn instruction.
How to create a Burn instruction ?
We use the burn instruction from token_program to burn tokens. A CPI call is made to token_program to achieve this.
Let us first update the import in lib.rs file
use anchor_spl::{token::{self, Mint, Token, TokenAccount, FreezeAccount, ThawAccount, Burn}, associated_token::AssociatedToken};
Add burn_token instruction.
    pub fn burn_token(ctx : Context<BurnToken>) -> Result<()> {
        let cpi_context = CpiContext::new(
            ctx.accounts.token_program.to_account_info(),
            Burn {
                from : ctx.accounts.payer_mint_ata.to_account_info(),
                mint : ctx.accounts.spl_token_mint.to_account_info(),
                authority : ctx.accounts.payer.to_account_info()
            },
        );
        token::burn(cpi_context, 1)?; // we burn 1 token
        Ok(())
    }
We burn 1 token from payer_mint_ata account.
To test this, let's us write a test case in spl-token.ts file.
Add the following test case in describe block
  it("should burn a token of payer wallet ", async () => {
    try {
      const [splTokenMint, _1] = await findSplTokenMintAddress();

      const [vaultMint, _2] = await findVaultAddress();

      const [payerMintAta, _3] = await findAssociatedTokenAccount(
        payer.publicKey,
        splTokenMint
      );

      const tx = await program.methods
        .burnToken()
        .accounts({
          splTokenMint: splTokenMint,
          vault: vaultMint,
          associatedTokenProgram: ASSOCIATED_TOKEN_PROGRAM_ID,
          tokenProgram: TOKEN_PROGRAM_ID,
          systemProgram: SystemProgram.programId,
          payerMintAta: payerMintAta,
          rent: anchor.web3.SYSVAR_RENT_PUBKEY,
          payer: payer.publicKey,
        })
        .signers([payer])
        .rpc();

      console.log("Your transaction signature", tx);
    } catch (err) {
      console.log(err);
    }
  });
Run the test command
anchor test
With that, we should see the below output with a successfully executed transaction.

That's it! We have learnt how to create a new mint,transfer, freeze, thaw and burn it to any accounts.
Next Steps
Next, we will discuss about other operations like approve, set_authority and doing a CPI call with a signer seed phrase.
If you are building a richer application, or want NFTs that can upgrade overtime, checkout the Meta Blocks protocol.


![How to mint Solana NFTs using Candy Machine V2 [includes code] - cover image](/optimized-img/content/posts/mint-nft-cm-v2-cover.jpg/og.webp)

